최근 파판 7 리메이크를 DLC까지 아주 재밌게 플레이 했습니다. 사실상 파판 7 원작의 뼈대만 가져왔지 재창조한 수준 + 제가 좋아하는 일본 감성 + 전투 재미 + 좋은 브금까지 제 호감요소만 가득해서 도중 포기 안하고 끝까지 하게 됐네요 ㅎㅎ.
저는 파판을 한 번도 해보지 않았는데 의도치 않게 파판 7 리메이크가 파판 입문작이 되었습니다.
해당 게임은 스터터링이 심해서 인터넷에 모드질 하는게 굉장히 많이 나와있는데 제 컴퓨터가 고사양에 가깝고, FHD로 게임을 하니깐 스터터링은 크게 못느끼겠더라구요. 120fps로 하는데 마을 같이 사람이 많은 곳을 제외하면 대부분 풀 프레임 유지가 되었습니다.
하지만 한 가지 아쉬운 점이라고 한다면 역시 그래픽이였습니다. 이게 플스판에서 PC로 이식해온 작품같던데 그래서 그런가 플스에서 원할히 돌리기 위해서 동적 해상도[각주*하드웨어가 그래픽 처리를 하기 버거워 하면 해상도를 동적으로 낮춰서 프레임을 확보하는 기술입니다. 보통 인파가 몰리는 마을 같은 곳에서 CPU,GPU가 제 프레임을 못뽑겠다 싶으면 해상도를 뭉개면서 프레임을 확보합니다. 당연히 동적 해상도가 작동하는 와중에는 프레임이 출렁거리는 거 처럼 보이고 그래픽도 안좋아집니다.*]가 들어가 있고 흐릿해지는 DOF 및 안티가 떡칠되어 있어서 정말 좋지 못한 그래픽을 보여줍니다. 그래도 컷씬때는 그나마 봐줄만한데 필드에 돌아다니는건 좀..;
특히 해상도가 4K면 해상도빨로 좀 선명하게 보이는데 FHD로는 참 안타까운 그래픽을 보여주더라구요. 하지만 모드를 열심히 찾아본 끝에 역시 해결책이 있었습니다. 오늘은 FHD 환경을 기준으로 모드를 활용해서 게임 해상도를 4K까지 강제로 끌어올리는 방법과 그에 따라 발생하는 스터터링도 어느정도 잡아내는 방법을 알려드리겠습니다.
참고로 기존 FHD 해상도로 게임하다가 FHD 해상도에서 게임 해상도를 강제로 4K로 렌더링하면 정말 눈이 떠지는 기분으로, 모드질 후에는 정말 다른 게임이 된다고 해도 믿을정도로 그래픽이 향상됩니다. 해당 게임 플레이 타임이 꽤 되므로 컴퓨터 사양에 자신이 있으신 분들은 꼭 이 방법을 따라해보시길 추천드립니다.
+ 제목엔 FHD라고 못박아놨지만 QHD에도 적용됩니다. 다만 제가 QHD 모니터를 가지고 있진 않아서 그래픽이 어떻게 향상될 진 잘 모르겠네요.
시작 전
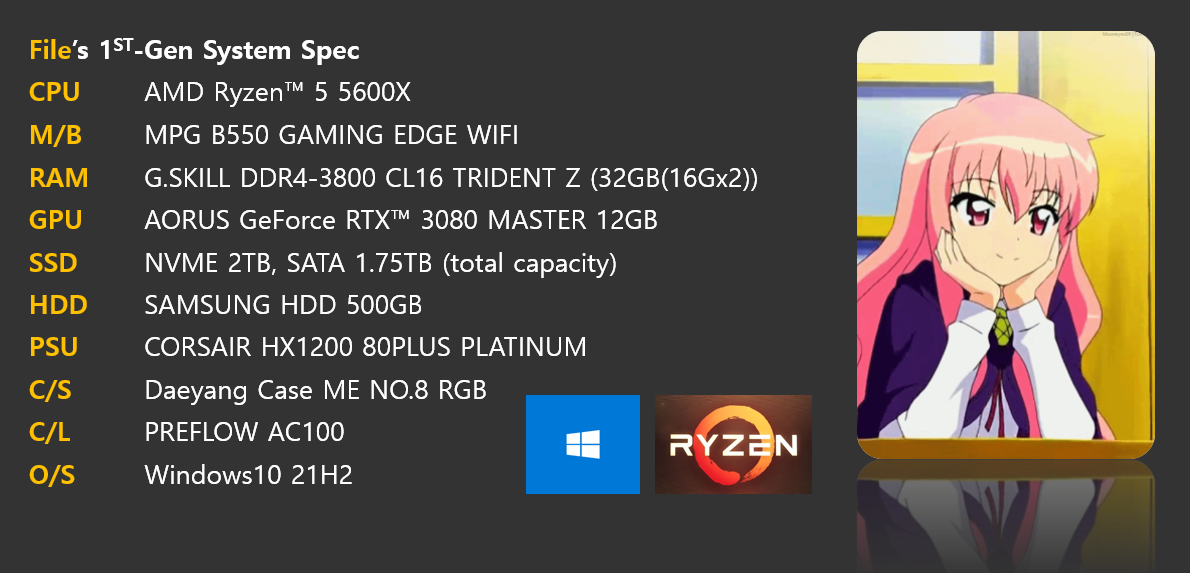
위는 제 스펙표인데요. 일단 오늘할게 FHD에서 돌아가는 파판을 강제로 4K로 렌더링하게 시키는거라서 사실상 4K 60FPS를 원할하게 돌릴만한 고성능 PC가 필요합니다.
4K 텍스쳐 설정 및 모든 모드를 적용함을 기준으로 CPU는 5600X 이상, GPU는 60프레임이 목표라면 3070~3070ti 이상, 90프레임 이상 확보는 3080 12gb, 3080ti 하급, 4070s 정도를 권장합니다.
그냥 게임을 돌리는거 자체도 힘드신 분들은 해당 모드 적용이 어려우니 참고 부탁드립니다. 오늘 설정 자체가 4K로 렌더링 하는거랑 같아서 어쩔수가 없습니다. 사실 저처럼 RTX3080 쓰면서 모니터 FHD 쓰는 사람이 얼마나 될까 싶지만요 ㅎㅎ;
모드 다운로드
https://www.nexusmods.com/finalfantasy7remake/mods/74?tab=files
FFVIIHook - INI and dev console unlocker
Unlocks the dev-console, giving access to console commands & easy changes to the games CVars - along with allowing loose INI config files to be loaded in from the games config folder
www.nexusmods.com
1. FFVIIHook - 4K 강제 렌더링, 스터터링 줄이기, 동적 해상도 제거
먼저 가장 중요하고 기초적인 해당 모드를 깝니다. 사실 해당 모드 하나만 깔아도 거의 설정 70%는 다한겁니다. 해당 모드로 4K 강제 렌더링 및 스터터링 잡는거까지 다 세팅할 수 있습니다. 해당 모드는 정확히는 파판 7 리메이크에 기본 탑재되어 있는걸로 보이는 개발자용 콘솔을 강제로 열어서 그 개발자용 콘솔로 게임 엔진 그래픽 설정을 할 수 있게 도와주는 모드입니다.
하지만 콘솔로 건들 수 있는 옵션들이 무려 1390개며, 게임을 껐다키면 콘솔로 설정한 게 다시 리셋되기 때문에 게임 엔진 그래픽 설정을 콘솔 안에서 하는걸론 무리가 있습니다. 하지만 이 모드를 깔았다면 특정 정해진 위치에 ini 파일을 배치하고 거기에 세팅값을 입력하면 콘솔로 엔진 값 설정을 일일히 안해도, 게임 킬때마다 ini 파일에서 그래픽 설정을 불러와서 자동 적용을 할 수 있습니다.
이 특정 정해진 위치는 후술합니다.
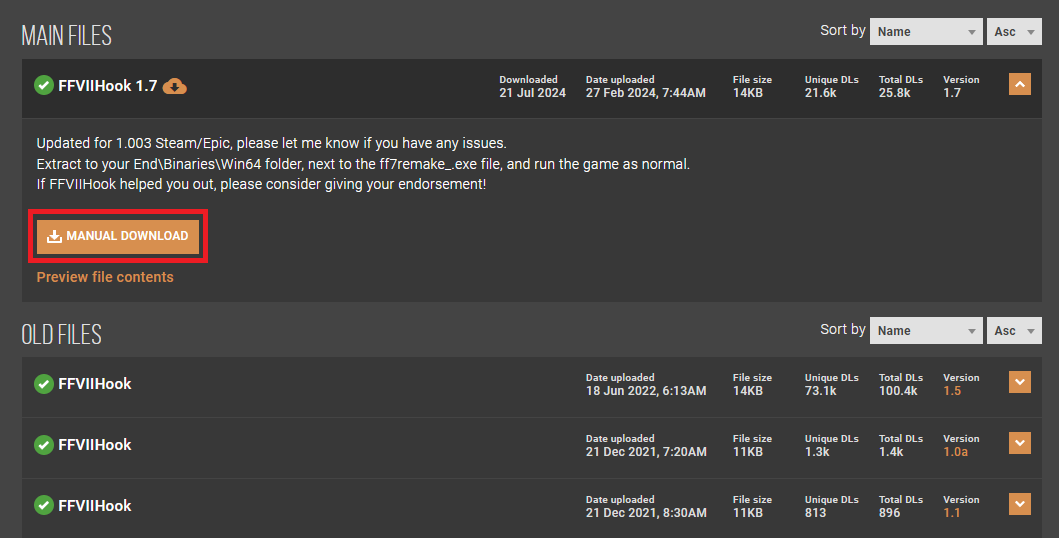
다운로드의 경우 링크에서 스팀 에픽판 최신 버전 1.003을 기준으로 맨 위에 있는 Manual Download를 눌러서 모드를 다운로드 받아주세요.
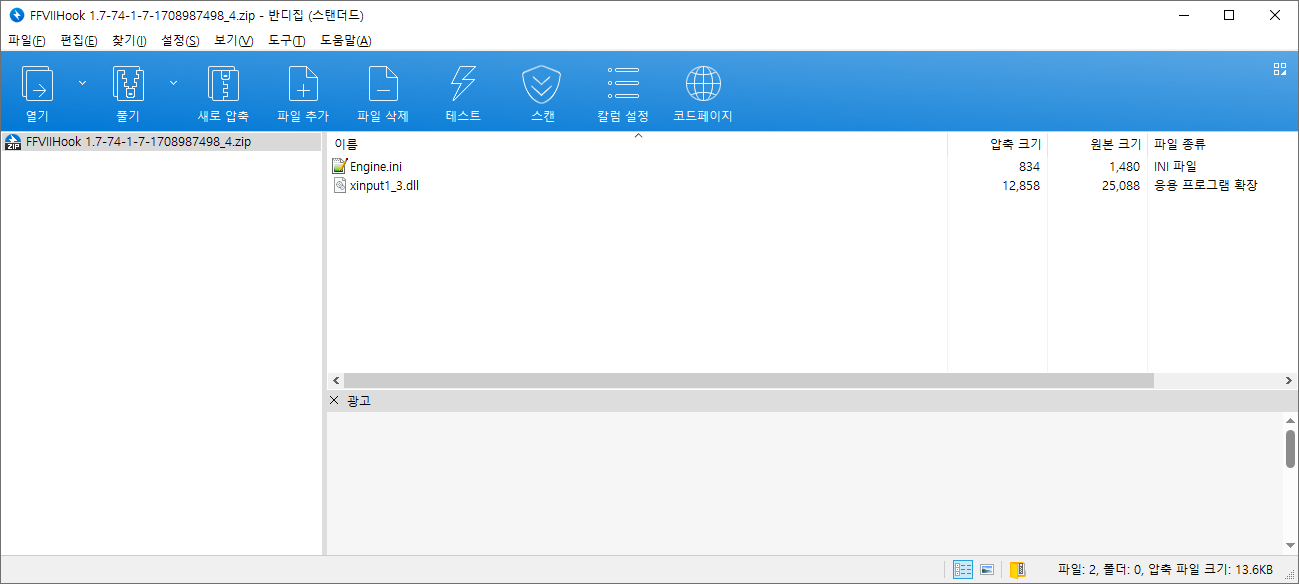
압축 파일을 여시면 위 처럼 2개의 파일이 보이실건데 Engine.ini는 무시하시고 xinput1_3.dll을
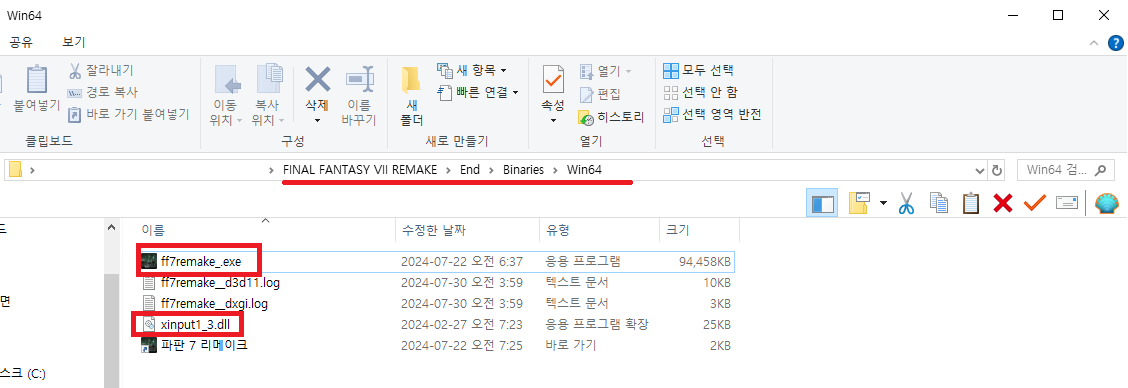
파판 게임파일 경로 \ End\Binaries\Win64 에 넣어주세요.
"ff7remake_.exe" 라는 실행파일과 같이 dll 파일이 있으면 됩니다. 참고로 ff7remake.exe 파일이 아니라 ff7remake_.exe 입니다. 끝에 "_" 언더바가 있는 파일에 넣어야 제대로 적용이 됩니다. 언더바 없는 파일에 넣으면 적용안되니깐 주의해주세요.
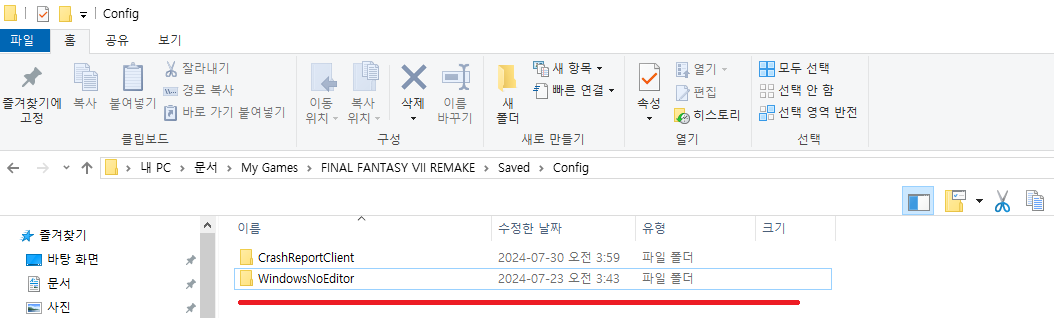
그 다음으로 내 문서를 연다음에 Mygames \ FINAL FANTASY VII REMAKE \ Saved \ Config 으로 이동합니다.
안에 CrashReportClient 라는 폴더 1개만 있을건데 WindowsNoEditor 라는 이름으로 새 폴더를 하나 만들어주세요.
이미 있다면 만들 필요 없습니다. 하지만 대부분 모드 새로 받는 분들의 경우 이 폴더가 없을겁니다.
그리고 새로 만든 WindowsNoEditor 폴더 안으로 들어갑니다

폴더 안의 빈 공간 오른쪽 클릭 - 새로 만들기 - 텍스트 문서로 파일 하나 만들어주시고 파일명은 Engine.ini 이라고 만들어주세요.
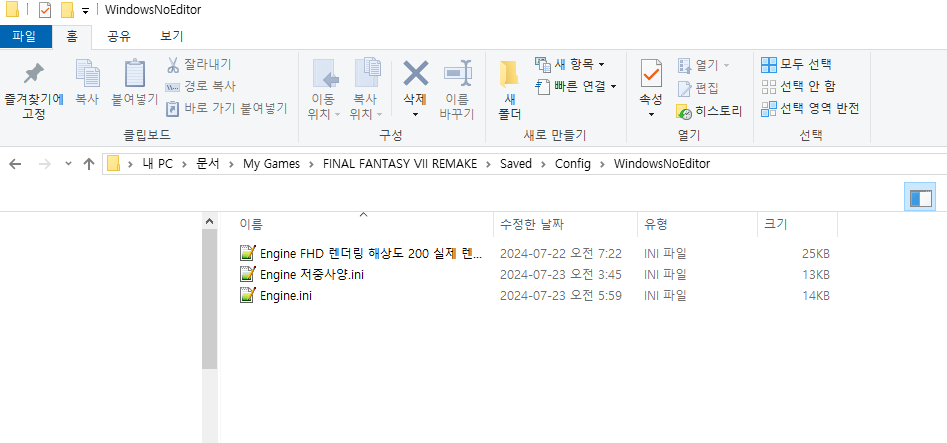
만들면 대충 이렇게 됩니다. 참고로 저는 여러가지 설정을 모아두기 위해 여러개를 만들어놨는데 저 중에서 실제로 적용되는건 "Engine.ini" 파일 딱 1개입니다. Engine.ini 파일을 만드셨으면 아래 세팅을 그대로 파일에 붙여넣기 합니다.
[SystemSettings]
# Edit this file with any CVar changes you want the game to use on startup (make sure they're underneath the [SystemSettings] line)
# and copy it into your "Documents\My Games\FINAL FANTASY VII REMAKE\Saved\Config\WindowsNoEditor\" folder, as Engine.ini
# (you might need to create the WindowsNoEditor folder, since game doesn't create it by default)
# If CVars don't seem to be changed ingame (you can check with dev-console), try renaming Engine.ini to Engine instead
# as your system might be hiding the existing .ini extension (Windows hides extensions by default)

# The ingame resolution options are limited to 2160p and below
# but you can uncomment the r.SetRes line below & change it to any custom resolution supported by your GPU/monitor
# If the SetRes string ends with "f" (without quotes), the game will try using exclusive fullscreen (requires -dx11 launch param)
# Similarly, "wf" will run it in a borderless window, while "w" will use windowed mode
# Note that exclusive fullscreen seems to have issues when alt-tabbing!
#r.SetRes=2560x1440f  # 고정전체화면을 사용하려면 r 앞의 샵을 지우고 해상도를 넣어주세요. 대신 알트탭시 오류가 발생하는 문제가 있습니다.

# Uncomment lines below to disable the buggy dynamic resolution used by the game
# (UE4 on PC isn't meant to use DRS, UE4 devs themselves have said it won't run on PC properly, see my post for more info: https://forums.nexusmods.com/index.php?/topic/10858168-ffviihook-ue4-dev-console-unlocker/page-44#entry103836498)
#Resolution & Framerate
r.SetRes=1920x1080wf
t.MaxFPS=0
r.DynamicRes.OperationMode=0
r.DynamicRes.MinScreenPercentage=100
r.DynamicRes.MaxScreenPercentage=100
r.ScreenPercentage=200
sg.ResolutionQuality=100.000000
sg.ViewDistanceQuality=3
sg.AntiAliasingQuality=3
sg.ShadowQuality=2
sg.AmbientOcclusionQuality=3
sg.PostProcessQuality=3
sg.TextureQuality=3
sg.EffectsQuality=2
sg.FoliageQuality=3
sg.VolumetricFogQuality=1
sg.GrassDrawDistanceQuality=2
sg.ScreenSpaceReflectionsQuality=2
sg.ReflectionCaptureActorsQuality=1
sg.RefractionQuality=2
sg.SSGIQuality=2
sg.CapsuleShadowQuality=2
sg.ScreenSpaceShadowQuality=2
sg.LightShaftQuality=2
sg.TranslucencyQuality=2
sg.SubSurfaceScatteringQuality=1
sg.ContactShadowQuality=1
sg.CharacterTextureDetailQuality=3
sg.WorldTextureDetailQuality=3
sg.WorldLODQuality=3
sg.CharacterLODQuality=3
sg.BloomQuality=2

r.Upscale.Quality=2                                ;Defines the quality in which ScreenPercentage and WindowedFullscreen scales the 3d rendering. 0: Nearest filtering 1: Simple Bilinear 2: Directional blur with unsharp mask upsample. 3: 5-tap Catmull-Rom bicubic, approximating Lanczos 2. (default) 4: 13-tap Lanczos 3. 5: 36-tap Gaussian-filtered unsharp mask (very expensive, but good for extreme upsampling).
r.Upscale.Softness=1	                           ;Amount of sharpening for Gaussian Unsharp filter (r.UpscaleQuality=5). Reduce if ringing is visible 1: Normal sharpening (default) 0: No sharpening (pure Gaussian).
r.SimpleForwardShading=1                           ;Whether to use the simple forward shading base pass shaders which only support lightmaps + stationary directional light + stationary skylight. All other lighting features are disabled when true. This is useful for supporting very low end hardware, and is only supported on PC platforms. 0:off, 1:on
r.Tonemapper.Quality=2                             ;Defines the Tonemapper Quality in the range 0..5, Depending on the used settings we might pick a faster shader permutation, 0: basic tonemapper only, lowest quality, 1: + FilmContras, 2: + Vignette, 3: + FilmShadowTintAmount, 4: + Grain, 5: + GrainJitter = full quality (default)
r.Tonemapper.GrainQuantization=1	               ;0: low (minor performance benefit) 1: high (default, with high frequency pixel pattern to fight 8 bit color quantization)
r.FastBlurThreshold=0                              ;0 disable - 7 Defines at what radius the Gaussian blur optimization kicks in (estimated 25% - 40% faster). The optimization uses slightly less memory and has a quality loss on smallblur radius.
r.SceneColorFormat=4
r.MaterialQualityLevel=2                           ;0 corresponds to low quality materials, as defined by quality switches in materials, 1 corresponds to high and 2 for medium. 3 for epic* unknown?
r.SceneColorFringe.Max=0                           ;Allows to clamp the postprocess setting (in percent, Scene chromatic aberration / color fringe to simulate an artifact that happens in real-world lens, mostly visible in the image corners) -1: don’t clamp (default) -2: to test extreme fringe
r.ReflectionEnvironmentBeginMixingRoughness=0.000000
r.ReflectionEnvironmentEndMixingRoughness=0.990000
r.SSR.MaxRoughness=1.100000
r.AOAsyncBuildQueue=1                              ;Whether to asynchronously build distance field volume data from meshes.
r.AmbientOcclusionLevels=2                         ;Defines how many mip levels are using during the ambient occlusion calculation. This is useful when tweaking the algorithm. <0: decide based on the quality setting in the postprocess settings/volume and r.AmbientOcclusionMaxQuality (default) 0: none (disable AmbientOcclusion) 1: one 2: two (costs extra performance, soft addition) 3: three (larger radius cost less but can flicker)
r.AmbientOcclusion.Denoiser=1
r.Shadow.CSM.MaxCascades=3
r.Shadow.Denoiser=1
r.EmitterSpawnRateScale=0.8
r.LightShaftNumSamples=6
r.LPV.Intensity=1.100000
r.LPV.EmissiveMultiplier=1.100000
r.LPV.DiffuseIntensity=1
r.BloomQuality=2
r.UseHighQualityBloom=0
r.FogDensity=0.4	                                ;Allows to override the FogDensity setting (needs ExponentialFog in the level). Using a strong value allows to quickly see which pixel are affected by fog. Using a start distance allows to cull pixels are can speed up rendering. <0: use default settings (default: -1) >=0: override settings by the given value (0:off, 1=very dense fog)
r.FogStartDistance=0.1	                            ;Allows to override the FogStartDistance setting (needs ExponentialFog in the level).<0: use default settings (default: -1) >=0: override settings by the given value (in world units)
r.DOF.TemporalAAQuality=0	                        ;Quality of temporal AA pass done in DOF. 0: Faster but lower quality; 1: Higher quality pass (default).
r.DepthOfField.MaxSize=20	                        ;Allows to clamp the gaussian depth of field radius (for better performance), default: 100
r.DepthOfField.NearBlurSizeThreshold=0.001	        ;Sets the minimum near blur size before the effect is forcably disabled. Currently only affects Gaussian DOF. (default: 0.01)
r.DOF.Scatter.NeighborCompareMaxColor=12     	    ;Controles the linear color clamping upperbound applied before color of pixel and neighbors are compared. To low, and you may not scatter enough; to high you may scatter unnecessarily too much in highlights (Default: 10).
r.DepthOfFieldQuality=3	                            ;Allows to adjust the depth of field quality. Currently only fully affects BokehDOF. GaussianDOF is either 0 for off, otherwise on.0: Off 1: Low 2: high quality (default, adaptive, can be 4x slower) 3: very high quality, intended for non realtime cutscenes, CircleDOF only (slow) 4: extremely high quality, intended for non realtime cutscenes, CircleDOF only (very slow)
r.PostProcessAAQuality=3	                        ;Defines the postprocess anti aliasing method which allows to adjust for quality or performance.0:off, 1:very low (faster FXAA), 2:low (FXAA), 3:medium (faster TemporalAA), 4:high (default TemporalAA), 5:very high, 6:max
r.TemporalAAFilterSize=1                          ;Size of the filter kernel. (1.0 = smoother, 0.0 = sharper but aliased).
r.TemporalAAUpsampleFitered=1                       ;Use filtering to fetch color history during TamporalAA upsampling (see AA_FILTERED define in TAA shader). Disabling this makes TAAU faster, but lower quality.
r.TemporalAASamples=8                              ;Number of jittered positions for temporal AA (4, 8=default, 16, 32, 64).
r.SSGI.Enable=1      	                                        ;Whether to enable SSGI (defaults to 0).
r.SSGI.HalfRes=1	                                            ;Whether to do SSGI at half resolution (defaults to 0).
r.SSGI.LeakFreeReprojection=1	                                ;Whether use a more expensive but leak free reprojection of previous frame's scene color.
r.SSGI.Quality=2	                                            ;Quality setting to control number of ray shot with SSGI, between 1 and 4 (defaults to 4).
r.SSS.Quality=1                                     ;Defines the quality of the recombine pass when using the SubsurfaceScatteringProfile shading model 0: low (faster, default) 1: high (sharper details but slower) -1: auto, 1 if TemporalAA is disabled (without TemporalAA the quality is more noticable)
r.SSS.SampleSet=1                                   ;Defines how many samples we use for Screenspace Subsurface Scattering feature. 0: lowest quality (6*2+1) 1: medium quality (9*2+1) 2: high quality (13*2+1) (default)
r.SSS.Checkerboard=1                                ;Enables or disables checkerboard rendering for subsurface profile rendering. This is necessary if SceneColor does not include a floating point alpha channel (e.g 32-bit formats) 0: Disabled (high quality) 1: Enabled (low quality). Surface lighting will be at reduced resolution. 2: Automatic. Non-checkerboard lighting will be applied if we have a suitable rendertarget format
r.SSS.HalfRes=1                                     ;0: full quality (not optimized, as reference) 1: parts of the algorithm runs in half resolution which is lower quality but faster (default)
r.SSS.Scale=2                                       ;Character skin quality 0 to a value of 10. GPU heavy
r.SSS.Filter=1
r.DiffuseIndirect.Denoiser=1
r.MipMapLODBias=-15                                  ;Apply additional mip map bias for all 2D textures, range of -15.0 to 15.0
r.LandscapeLODBias=-15                               ;LOD bias for landscape/terrain meshes.
r.SkeletalMeshLODBias=-15                            ;LOD bias for skeletal meshes (does not affect animation editor viewports).
r.MeshDrawCommands.AllowOnDemandShaderCreation=1	;How to create RHI shaders: 0: Always create them on a Rendering Thread, before executing other MDC tasks. 1: If RHI supports multi-threaded shader creation, create them on demand on tasks threads, at the time of submitting the draws.
r.MeshDrawCommands.DynamicInstancing==1	            ;Whether to dynamically combine multiple compatible visible Mesh Draw Commands into one instanced draw on vertex factories that support it.
r.ForceAllCoresForShaderCompiling=1   	            ;When set to 1, it will ignore INI settings and launch as many ShaderCompileWorker instances as cores are available. Improves shader throughput but for big projects it can make the machine run OOM
r.Shaders.FastMath=1
r.UseShaderPredraw=1                                ;Predrawing of tracked RHI draw states to eliminate first-use hitches.
r.RDG.AsyncCompute=2                                ;Controls the async compute policy. 0:disabled, no async compute is used; 1:enabled for passes tagged for async compute (default); 2:enabled for all compute passes implemented to use the compute command list;
r.UseAsyncShaderPrecompilation=1                    ;Asynchronous precompilation of shader code during gameplay
r.AmbientOcclusion.AsyncComputeBudget=4             ;This is a low level developer tweak to get best performance on hardware that supports AsyncCompute. 0: least AsyncCompute, 1: .. (default), 4: most AsyncCompute
r.AsyncCreateLightPrimitiveInteractions=1
r.Streaming.Boost=1                                 ;=1.0: normal <1.0: decrease wanted mip levels >1.0: increase wanted mip levels
r.Streaming.PoolSize=5700
r.Streaming.MaxTempMemoryAllowed=100000	            ;Maximum temporary memory used when streaming in or out texture mips. This memory contains mips used for the new updated texture. The value must be high enough to not be a limiting streaming speed factor.
r.Streaming.CheckBuildStatus=1	                    ;If non-zero, the engine will check whether texture streaming needs rebuild.
r.Streaming.DefragDynamicBounds=1                   ;If non-zero, unused dynamic bounds will be removed from the update loop
r.Streaming.HLODStrategy=1
r.CreateShadersOnLoad=1
r.UseShaderCaching=1
r.MultithreadedShadowmapEncode=1                    ;Shadowmap encoding after rebuild lightmaps is done multithreaded.
r.MultithreadedLightmapEncode=1                     ;Lightmap encoding after rebuild lightmaps is done multithreaded.
r.Streaming.AmortizeCPUToGPUCopy=1

r.Streaming.MaxNumTexturesToStreamPerFrame=2
r.Streaming.NumStaticComponentsProcessedPerFrame=2

r.Streaming.FramesForFullUpdate=1
r.Streaming.MinMipForSplitRequest=0
r.Streaming.HiddenPrimitiveScale=1

foliage.DensityScale=1.0
grass.DensityScale=1.0

s.AsyncLoadingThreadEnabled=1
s.AsyncLoadingTimeLimit=0.1
s.LevelStreamingActorsUpdateTimeLimit=0.1
s.UnregisterComponentsTimeLimit=0.1
s.AsyncLoadingUseFullTimeLimit=0
s.IoDispatcherCacheSizeMB=256
s.LevelStreamingComponentsRegistrationGranularity=1
s.LevelStreamingComponentsUnregistrationGranularity=1
s.MaxIncomingRequestsToStall=1
s.MaxReadyRequestsToStallMB=0
s.MinBulkDataSizeForAsyncLoading=0
s.PriorityAsyncLoadingExtraTime=0
위 세팅은 제가 게임을 플레이하면서 만든 세팅으로 해당 글과 해당 글의 세팅 값을 섞어서 만든 설정입니다. 사실 처음에 여기의 Epic Cinematic Quality 값을 적용했는데 제대로 적용이 되지 않았습니다.
https://bbs.ruliweb.com/game/85327/read/13019
[그래픽 팁] 그래픽 좋아지게 만들기 (코드 일부 수정) | 파이널 판타지 7 리메이크 | 루리웹
필수-우선 dx11 로 변경해줘야 하는데에픽런처 설정에 보시면 게임 부분에 주석을 달 수있는 곳이 있는데 그곳에-dx11한줄만 넣어주심 됩니다스팀 역시 마찬가지로, 그리드 이미지 우클릭->속성->
bbs.ruliweb.com
해당 글을 보고 알았는데 설정 값을 [SystemSettings] 섹션 아래에 모두 모아줘야 하더라구요. 저는 처음에 ini 설정값이 제대로 들어간 줄 알고 게임하고 있었는데 제대로 해골물을 마시고 있었던 거였습니다. SystemSettings 하나만 작성하고 그 아래에 엔진 설정값을 입력하니깐 제대로 적용이 되는걸 확인할 수 있었습니다. (위 글 작성자님 덕분에 세팅을 편하게 할 수 있었습니다. 값 역시 참고했습니다.)
일단 위 Engine.ini 설정은 무조건 FHD 해상도에서 게임 내부 설정 90fps 제한을 두고 플레이하는 것에 한한 설정입니다. 다른 해상도 및 다른 프레임 제한에서는 문제가 발생할 수 있습니다.
만약에 다르게 세팅하고 싶으신 분들을 위해 저기 위에서 세팅값 뭐를 바꿔야 하는지 알려드리겠습니다.
r.SetRes=1920x1080wf우선 해상도 먼저 해상도는 이 값을 건드시면 됩니다. 참고로 해상도 입력시 끝에 꼭 f를 붙이셔야 하며 저기 w는 전체 창모드(borderless window) 로 돌리겠다 이말입니다.
r.SetRes=2560x1440wf예를 들어서 QHD 전체 창 모드는 이렇게 값을 주면 됩니다
r.SetRes=2560x1440f
만약에 전체 창 모드가 싫고 나는 전체 화면 모드 (exclusive fullscreen) 로 돌리고 싶다 하면 w를 빼고 이렇게 작성하면 됩니다. 하지만 주의점은 이렇게 전체 화면 모드의 경우 dx12가 아닌 dx11로 파판을 구동해야 합니다. dx11로 구동하지 않으면 독점 전체화면 모드는 동작하지 않습니다. dx11 설정의 경우 아래에서 다룰거니 좀 있다가 다루겠습니다.
r.DynamicRes.OperationMode=0
r.DynamicRes.MinScreenPercentage=100
r.DynamicRes.MaxScreenPercentage=100
이건 파판7 리메이크에 들어가 있는 동적 해상도를 끄는 코드입니다. 어떤 해상도를 사용하던 딱히 건들일 없습니다.
r.ScreenPercentage=200이제 중요한 렌더링 배율인데 이 세팅이 파판 7 리메이크의 그래픽 설정의 핵심중에 핵심이라고 볼 수 있습니다. 이 세팅 하나로 거의 게임의 전반적인 그래픽을 조정할 수 있습니다.
FHD 에서 4K 로 강제 렌더링하기 위해선 무조건 200을 입력해야 합니다. 200%로 뻥튀기 가능합니다. 기본값은 100입니다. 만약에 QHD에서 4K로 렌더링하고 싶으시면 150을 입력합니다. 4K 모니터를 사용중이라면 100 을 입력하고 이외의 값은 의미가 없습니다.
단순히 딱 이 값만 조정하면 4K로 렌더링이 돌아가서 스터터링 및 렉이 많이 심해지는데 다른 값이 많이 조정 되어 있어서 스터터링이 아주 심하게 느껴지진 않습니다. 전투시엔 렉 거의 없고 가끔 마을이나 인파 몰린곳에서 렉 걸린다는거 정도?
200% 강제 렌더링이 걸리면 FHD로 할 경우 정말 안경을 안쓰다가 쓴 수준으로 게임 그래픽이 선명해지고 개선됩니다. 지금까지 내가 왜 이런 쓰레기같은 그래픽으로 게임을 한거지? 싶을정도로 감탄이 나올실 겁니다. 그렇다고 해서 이거 딱 하나만 200으로 올려버리면 자질구레한 이펙트까지 전부 쓸 데 없이 선명하게 렌더링이 되서 렉덩어리 게임이 됩니다. 그래서 위에 수많은 옵션들이 눈으로 봤을 때 잘 구분되지도 않는 자질구레한 이펙트를 제거하는 옵션입니다.
r.Streaming.PoolSize=5700이제 이것도 꽤 중요한 설정인데 VRAM 의 한도치를 설정하는 옵션입니다. 0이 무제한이고 나머지는 제한을 걸 수 있습니다. 보통 이 게임 스터터링 대부분이 그래픽카드 VRAM을 잘 관리 못해서 일어납니다. 게임 자체 최적화 문제죠. 언뜻 보기엔 그냥 0으로 무제한을 주면 VRAM을 다 사용하게 해서 좋을 거 같지만 이러면 그래픽카드 풀로드가 걸리고 오히려 성능이 떨어지는걸 확인했습니다.
본인 VRAM이 10GB 이상 높은 편이다 하면 5700을 주시고 VRAM 이 딸려서 8GB 이하다 하면 2850을 주시면 됩니다.
r.Streaming.MaxNumTexturesToStreamPerFrame=2
r.Streaming.NumStaticComponentsProcessedPerFrame=2
이 값도 중요한데 먼저 게임 설정에서 60 프레임 제한으로 두시고 하시는 분들은 이 2개의 값을 3으로,
90프레임의 경우 이 2개의 값을 2로, 120프레임의 경우 이 값을 2로 주시면 됩니다. (만약 문제가 발생한다면 2개다 1로 설정)
이 설정의 경우 해당 링크 에서 자세한 설명이 나와있으니 아래 영어 원문을 참고하시길 바랍니다.
r.Streaming.PoolSize may need to be reduced depending on your VRAM budget, the game lags if a memory allocation fails, and you need ~1GB free at all times, maybe less, for dynamic loading of special effects. r.Streaming.PoolSize is in MB, and is in addition to the base VRAM the game needs to run (depends on graphical settings, roughly 3-5GB). Monitoring your VRAM usage on the title screen will show you how much memory remains for the pool size and extra special effects. Note: If you lower the pool size, it may delay the loading of textures significantly. The settings r.Streaming.MaxNumTexturesToStreamPerFrame and r.Streaming.NumStaticComponentsProcessedPerFrame are adjusted for 60FPS, so you may need to increase or decrease them for optimal performance if you play at a framerate other than 60. For example, if you are playing at 120FPS, you can halve those values (round up to be safe), divide by 1.5 for 90FPS, etc. Most stutter in the game is caused by texture loading lag, and you can control it with r.Streaming.MaxNumTexturesToStreamPerFrame. Unfortunately, the game doesn't seek ahead of time and preload textures dynamically, instead loading them as they are needed, with no regards to texture size or frame time. Controlling the number of textures per frame is an imperfect solution: Sometimes loading a set number of textures at once will be fast, and other times it will be slow, because textures vary in size. Through trial and error, I came to those number settings as the optimal performance at 60FPS while eliminating stutter and remaining seamless, so it should work for most systems, but you may need to tweak settings depending on your system. If you copy-pasted the text into your existing Engine.ini, remember to delete any duplicate entries to be sure the settings are correct. You may want to delete all r.Streaming.* settings not from this mod to be safe.
게임이 VRAM 할당에 실패하면 메모리 부족으로 인해 게임이 지연될 수 있으며, 특수 효과의 동적 로딩을 위해 항상 약 1GB의 여유 공간이 필요합니다. r.Streaming.PoolSize는 MB 단위로 설정되며, 게임이 실행되는 데 필요한 기본 VRAM(그래픽 설정에 따라 대략 3-5GB)에 추가됩니다. 타이틀 화면에서 VRAM 사용량을 모니터링하면 풀 크기와 추가 특수 효과에 필요한 메모리가 얼마나 남았는지 확인할 수 있습니다. 참고: 풀 크기를 줄이면 텍스처 로딩이 상당히 지연될 수 있습니다.
r.Streaming.MaxNumTexturesToStreamPerFrame 및 r.Streaming.NumStaticComponentsProcessedPerFrame 설정은 60FPS에 맞추어 조정되었으므로, 60FPS 이외의 프레임 속도로 플레이할 경우 최적의 성능을 위해 값을 늘리거나 줄여야 할 수 있습니다. 예를 들어, 120FPS로 플레이하는 경우 해당 값을 절반으로 줄일 수 있으며(안전을 위해 반올림), 90FPS의 경우 1.5로 나눌 수 있습니다.
게임의 대부분의 끊김 현상은 텍스처 로딩 지연으로 인해 발생하며, r.Streaming.MaxNumTexturesToStreamPerFrame로 이를 제어할 수 있습니다. 불행히도 게임은 미리 텍스처를 로드하지 않고 필요할 때마다 텍스처를 동적으로 로드하며, 텍스처 크기나 프레임 시간에 상관없이 로드됩니다. 프레임당 텍스처 수를 제어하는 것은 완벽한 해결책이 아닙니다. 텍스처 크기에 따라 특정 수의 텍스처를 한 번에 로드하는 것이 빠를 때도 있고 느릴 때도 있습니다.
시행착오를 통해 60FPS에서 끊김 현상을 제거하고 매끄러운 성능을 유지하는 최적의 설정 값을 찾았으므로 대부분의 시스템에서 작동할 것입니다. 하지만 시스템에 따라 설정을 조정해야 할 수 있습니다.
기존 Engine.ini 파일에 텍스트를 복사하여 붙여넣은 경우 중복된 항목을 삭제하여 설정이 올바르게 적용되었는지 확인해야 합니다. 안전을 위해 이 모드에서 제공하지 않은 모든 r.Streaming.* 설정을 삭제하는 것이 좋습니다.
2. Stuttering fix - DXVK method
https://www.nexusmods.com/finalfantasy7remake/mods/66?tab=files
Stuttering fix - DXVK method
This method will make your game feel buttery smooth as it will fix both frame pacing issues and (some of!) the asset loading stutter.
www.nexusmods.com
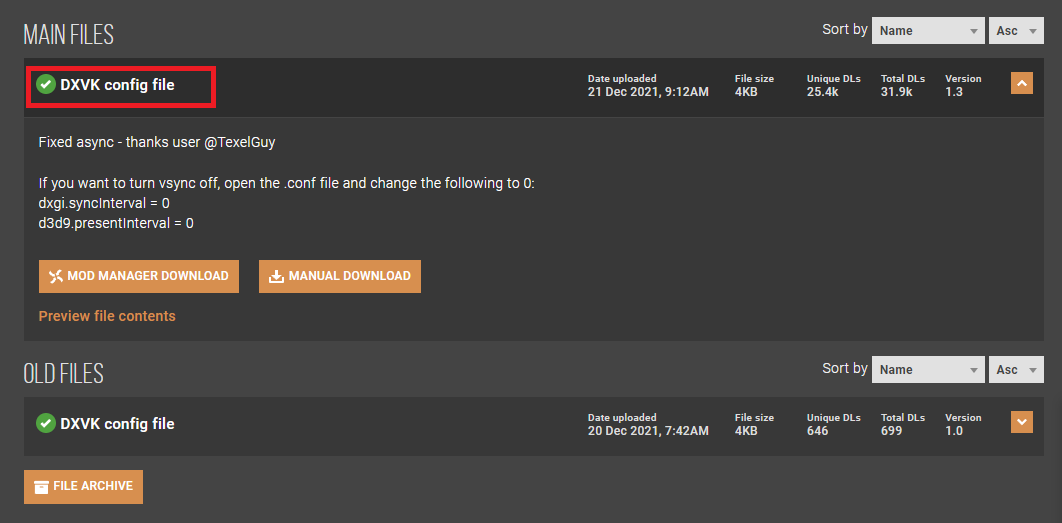
해당 링크에서 DXVK config file을 받습니다
https://github.com/Sporif/dxvk-async/releases/download/1.9.3/dxvk-async-1.9.3.tar.gz
이 파일도 받아줍니다.
그리고 나온 파일을 전부 아까전에 ffivhook 설치 할 때 넣었던 [ 파판 게임파일 경로 \ End\Binaries\Win64 ] 에 넣어줍니다.
참고로 dxvk-async-1.9.3.tar.gz 파일의 경우 x64 에 있는 내용물 중 dxgi.dll, d3d11.dll 2개의 파일만 옮겨주시면 됩니다.
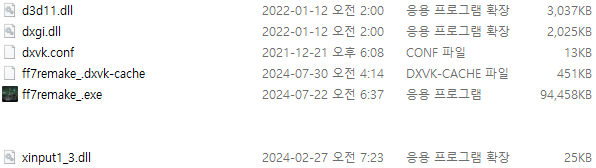
파일이 다 갖춰지면 대충 이런 모양새가 될겁니다. 역시 exe 파일 끝에 언더바 (_) 가 있는 실행 파일과 같이 있어야 합니다.
3. dx11로 실행시키기
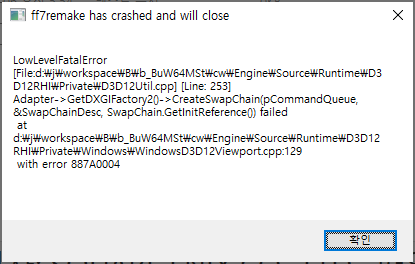
위 dxvk 모드를 적용시키고 파판을 그냥 키시면 위와 같은 오류가 뜨면서 게임 실행이 안될겁니다. dx11로 강제 실행을 시켜야 하는데요. dx11로 실행을 시키면 아까도 말했듯이 ffivhook 의 전체화면 모드를 사용할 수 있게 되고 스터터링이 줄어든다고 합니다. dx11 강제 실행시키긴 쉽습니다.
여러 가지 방법이 있는데
일단 스팀의 경우 라이브러리 탭으로 가서 파판 7 리메이크 우클릭 - 속성 - 실행 옵션에 -dx11 값을 입력해주시면 되고
에픽 게임즈의 경우 확인은 안해봐서 잘 모르겠으나 에픽 런처 실행 옵션에 -dx11을 넣을 수 있는 부분이 있다고 합니다. 또는 Binaries\ThirdParty\EOS 경로로 가서 epic_emu.ini 파일을 열고 AppName 부분을 찾아
AppName=FFVIIRemakeIntergrade -dx11 이렇게 끝에 -dx11을 추가해주면 된다고 하네요.
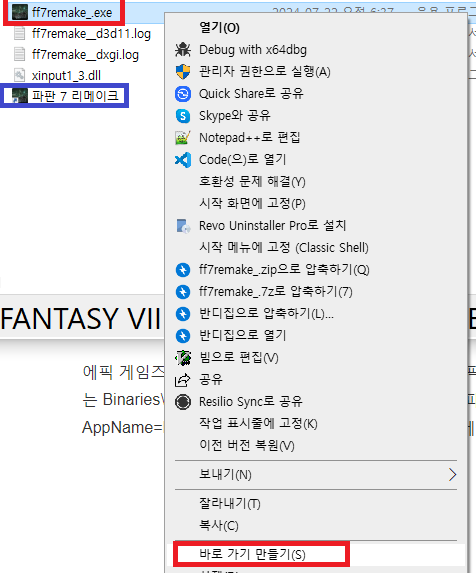
또는 간단한 방법으로 게임 실행 파일 우클릭 - 바로 가기 만들기를 해서 파란색 처럼 바로가기를 하나 만들고 (바로가기 이름은 제가 바꿔논겁니다)
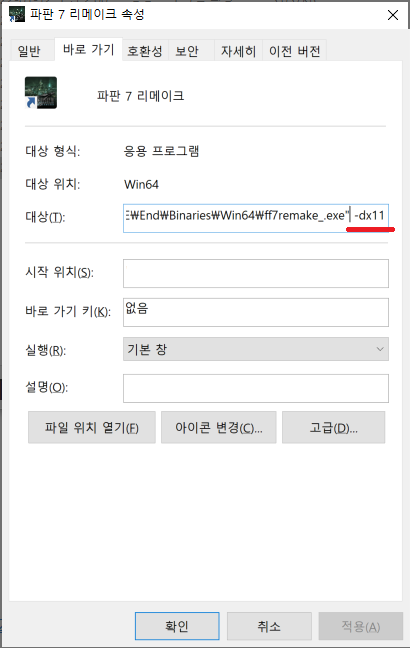
만들어진 바로가기 파일에 우클릭 - 속성으로 간다음에 바로 가기 탭에서
저 빨간색 밑줄 친 부분처럼 한 칸 띄고 -dx11을 입력해주고 바로가기를 실행하면 게임이 정상 구동됩니다.
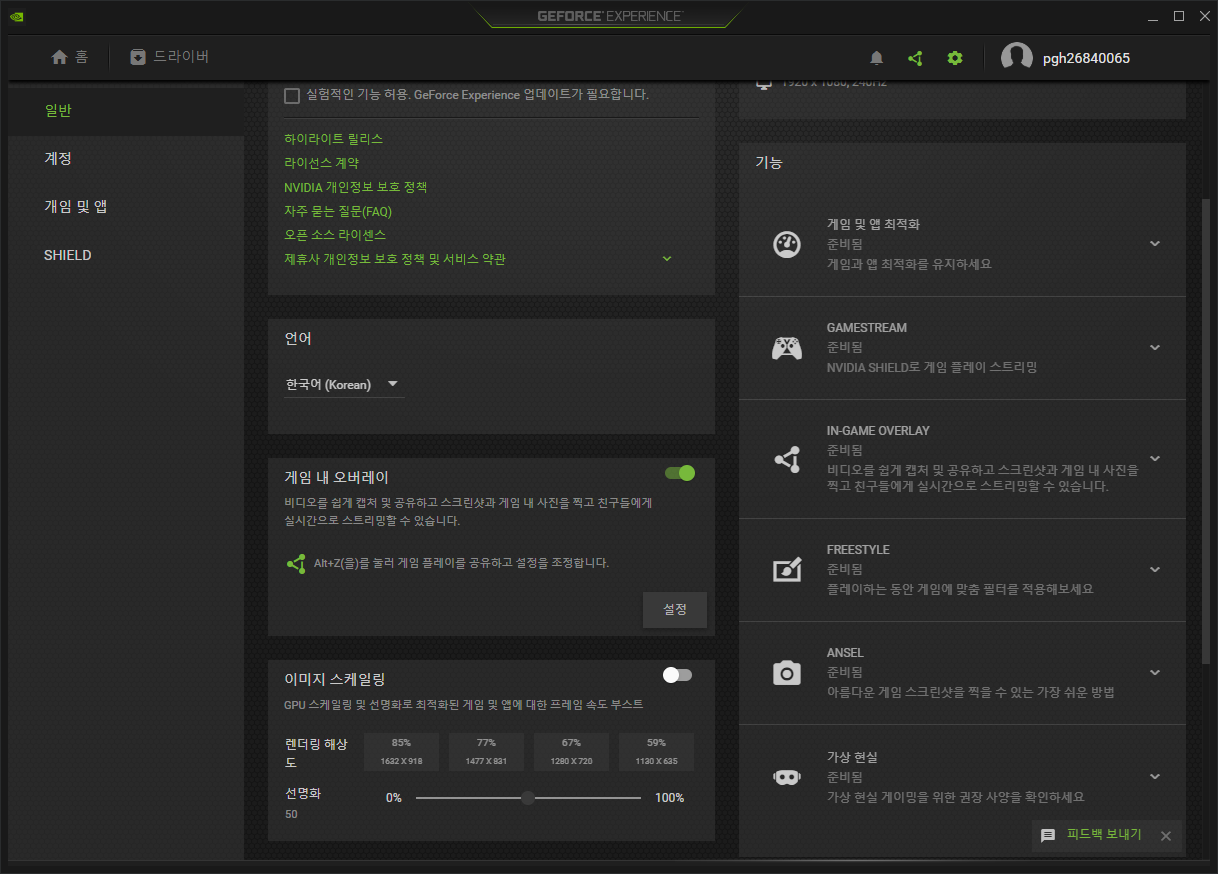
만약에 저렇게 해도 실행 안되시면 nvidia experience 가셔서 게임 내 오버레이 초록색으로 ON 되어 있는거 OFF 로 꺼주세요. 저거 켜져있으면 실행 안된다고 합니다.
4. nvidia 그래픽카드 설정 - 수직 동기화 설정

이것도 dx11 설정과 더불어 하면 좋다고 해서 해봤습니다. 엔비디아 제어판에서 파판 게임 파일 (언더바 있는거) 잡고 수직 동기 부분만 켜기로 해주시면 됩니다. 사진에 좀 진한 글씨로 표기된 "켜기" 부분이 설정할 거 끝입니다.
5. 4K 업스케일링 텍스처 모드, fov 모드 적용 (선택)
위 모드로 렌더링 해상도를 4K로 뻥튀기해도 게임 자체 텍스쳐들이 상당히 구린게 많아서 좀 별롭니다. 그리고 주인공 시야각이 최대로 늘려도 요즘 나오는 3D 게임에 비해 답답한 감이 있어요. 이 2개를 모드로 개선 가능합니다.
일단 4K 텍스쳐 모드인데 ESRGAN 이라는 AI 업스케일러를 통해 텍스쳐를 전체적으로 업그레이드 해놓은 모드가 있습니다. 프로젝트 명은 FF7 Remake HD PROJECT 인데 아무래도 업스케일러로 모든 텍스쳐들을 AI 기술로 뻥튀기 했다보니 정말 용량이 큽니다. 무려 54GB;; 기억상 파판 7 리멬 DLC 까지 다합해서 용량이 94GB나 하는데 이 모드까지 같이 설치하면 게임 1개가 148GB나 차지하게 됩니다.
근데 저는 레데리 2나 GTA 같은 게임하면서 이미 큰 용량엔 적응이 된 지라 그냥 받았습니다.
이 파일이 공유된게 넥서스 모드 사이트랑, 토렌트 파일 이렇게 있었는데 이 모드 넥서스 사이트가 터져서 구하기가 어려운 골때리는 상황에 쳐했습니다.
그래서 가져왔습니다. 토-렌트 파일!
마그넷
magnet:?xt=urn:btih:4685e8567262f78106e9b2d5129b7141c354f66a&dn=FF7%20Remake%20HD%20Project&tr=udp%3A%2F%2Ftracker.opentrackr.org%3A1337%2Fannounce&tr=udp%3A%2F%2Ftracker.openbittorrent.com%3A80%2Fannounce&tr=http%3A%2F%2Fhttp://www.torrent-downloads.to%3A2710%2Fannounce
아직까지 파판 팬분들이 많아서 인가 전세계적으로 시드 유지가 되고 있습니다. 저도 NAS에 파일을 두고 시드 유지중이긴 한데 언제까지 유지할 지는 잘 모르겠습니다.
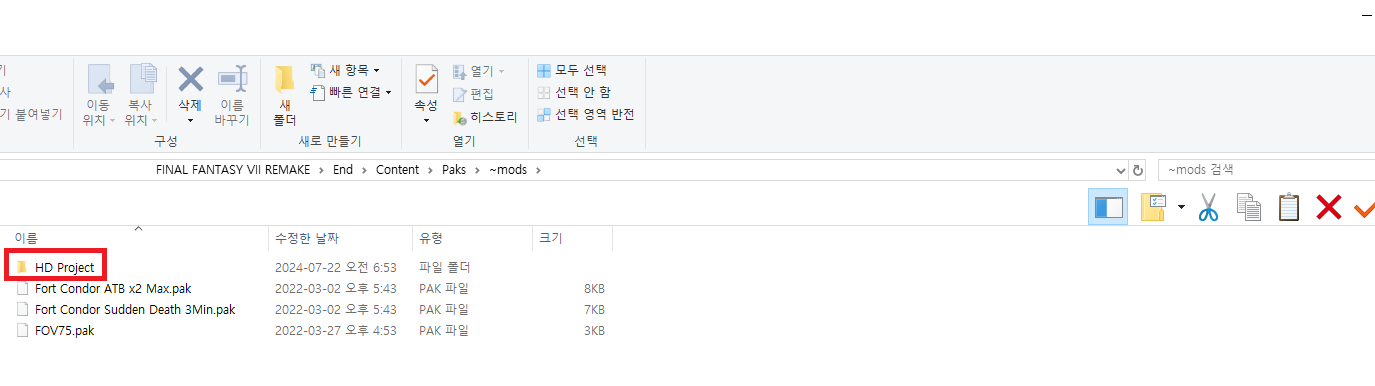
토렌트로 파일을 받고 나오는 폴더를 통째로 게임 경로 \ End \ Content \ Paks 에 가신다음에 ~mods 폴더가 없다면 ~mods 폴더라고 하나 새 폴더를 만드시고 (mods 가 아닙니다. ~mods 입니다. 앞에 물결표 무조건 넣어주세요)
받으신 HD Project 폴더를 통째로 넣어주세요.
일단 전 적용하고 해봤는데 이전하고 비교를 안해봐서 뭐가 적용된 진 솔직히 잘 모르겠더라구요.
https://www.nexusmods.com/finalfantasy7remake/mods/788?tab=files
FOV Plus
A simple .pak mod to change the Field of View
www.nexusmods.com
그리고 fov 모드 (시야각 모드) 의 경우 여기서 적당한 fov 파일을 받으시고
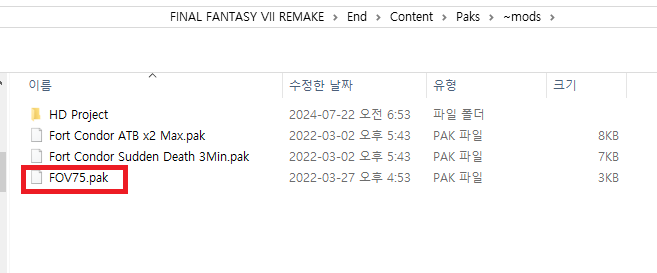
위에서 언급한 ~mods 폴더에 또 넣어주시면 됩니다. 저는 75가 적당하더군요. 참고로 Fort Condor 의 경우 콘도르 포트라고 파판 7 리멬 DLC에 나오는 미니게임인데 난이도가 좀 어려워서 그냥 치트모드 깔고 밀었습니다.
모드 적용 이후
힘들었던 모드 적용이 드디어 끝났습니다. 게임 하나 하는데 뭐이리 고생인지 어후.. 그냥 귀찮으신 분들은 사실 순정으로 겜해도 문제 없으나 4K 모니터로 하시는 분들이야 그렇고 FHD로 이 게임 하시는 분들은 상당히 그래픽에 아쉬움을 느낄까봐 준비한 포스팅입니다.
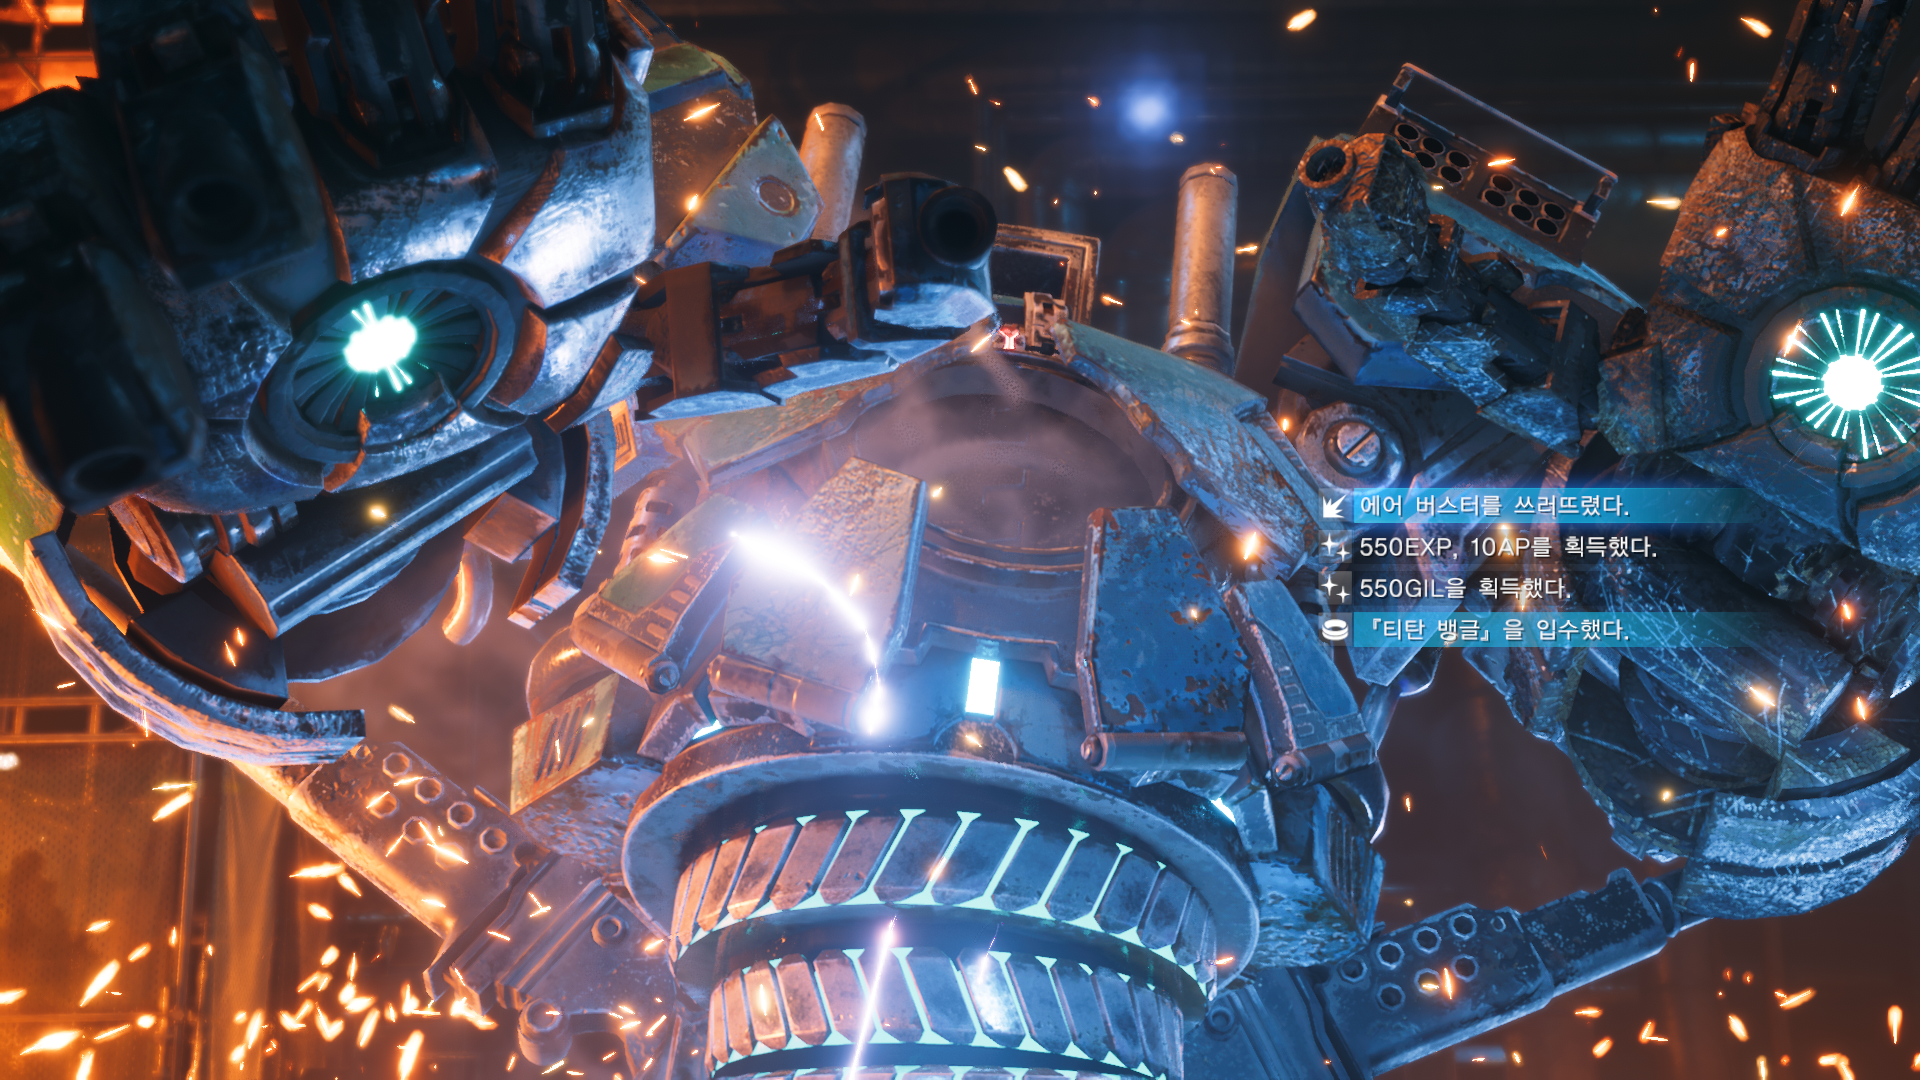
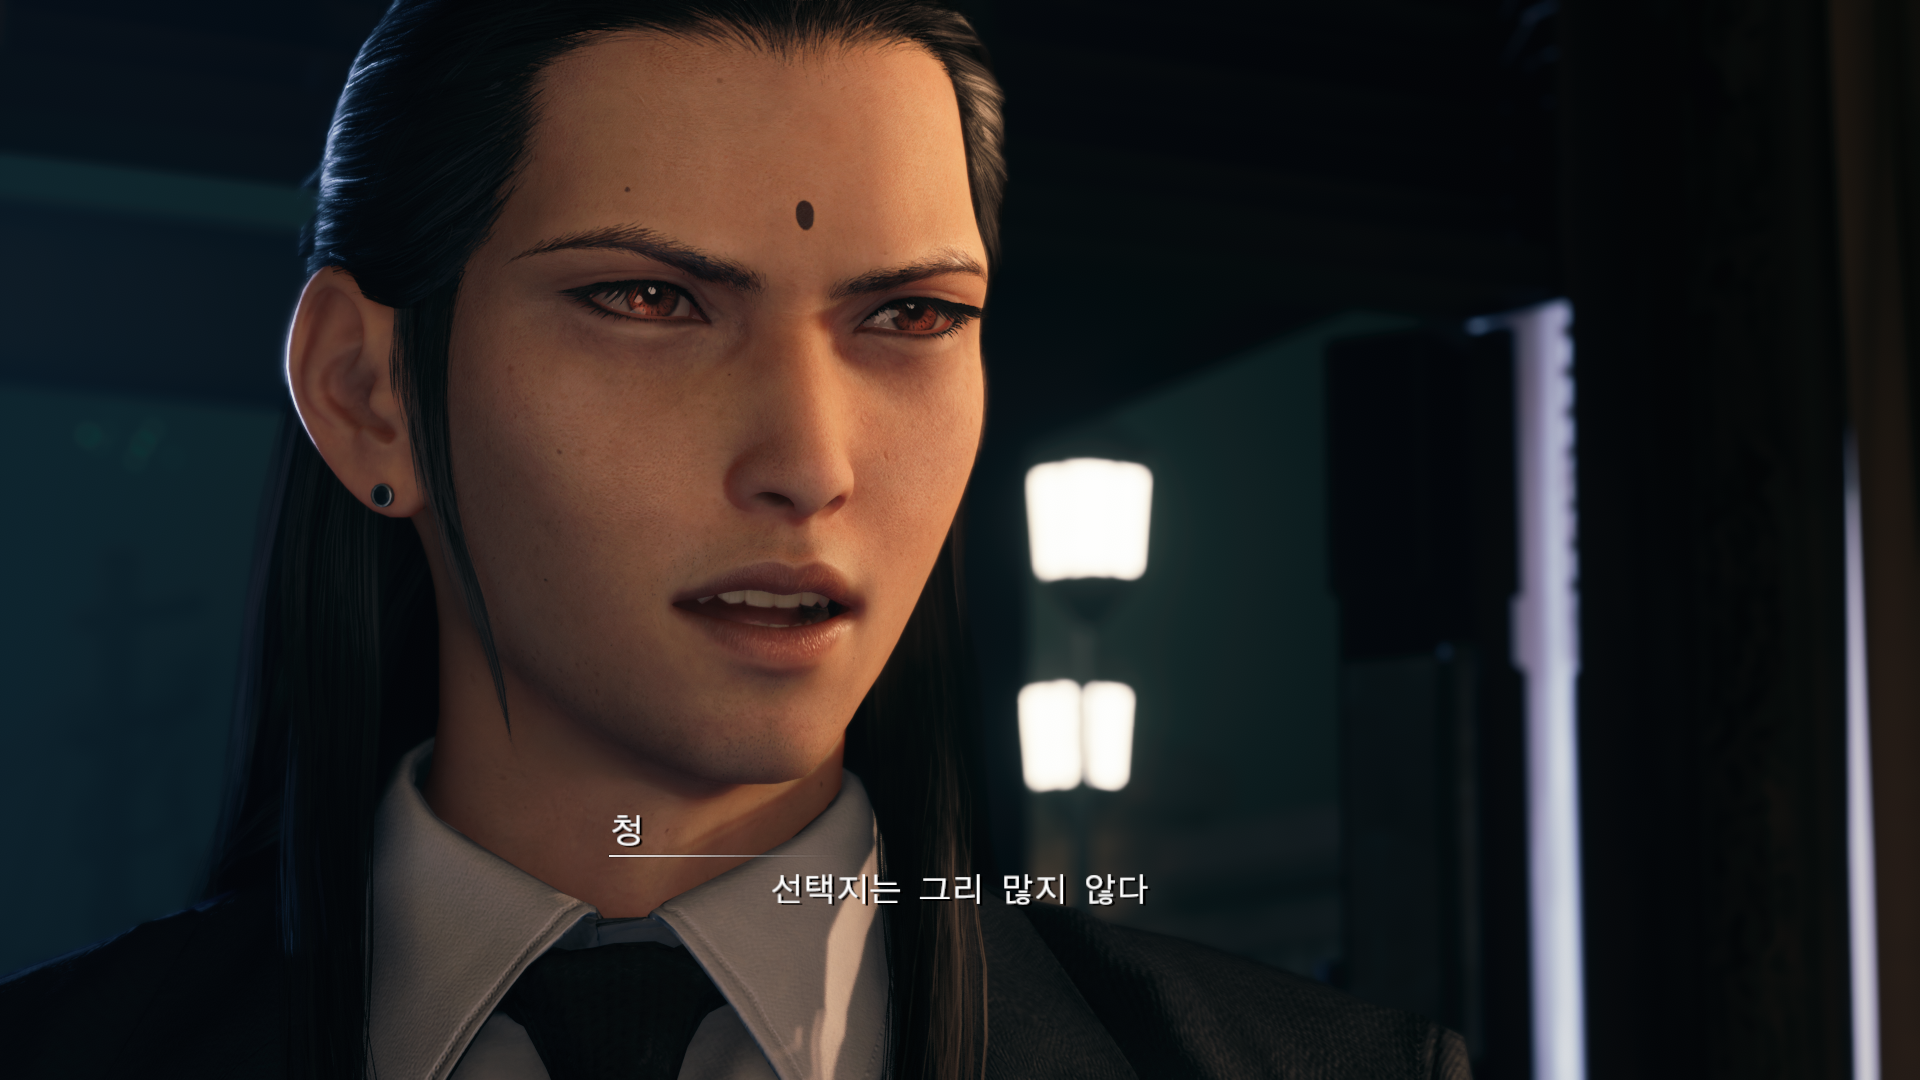
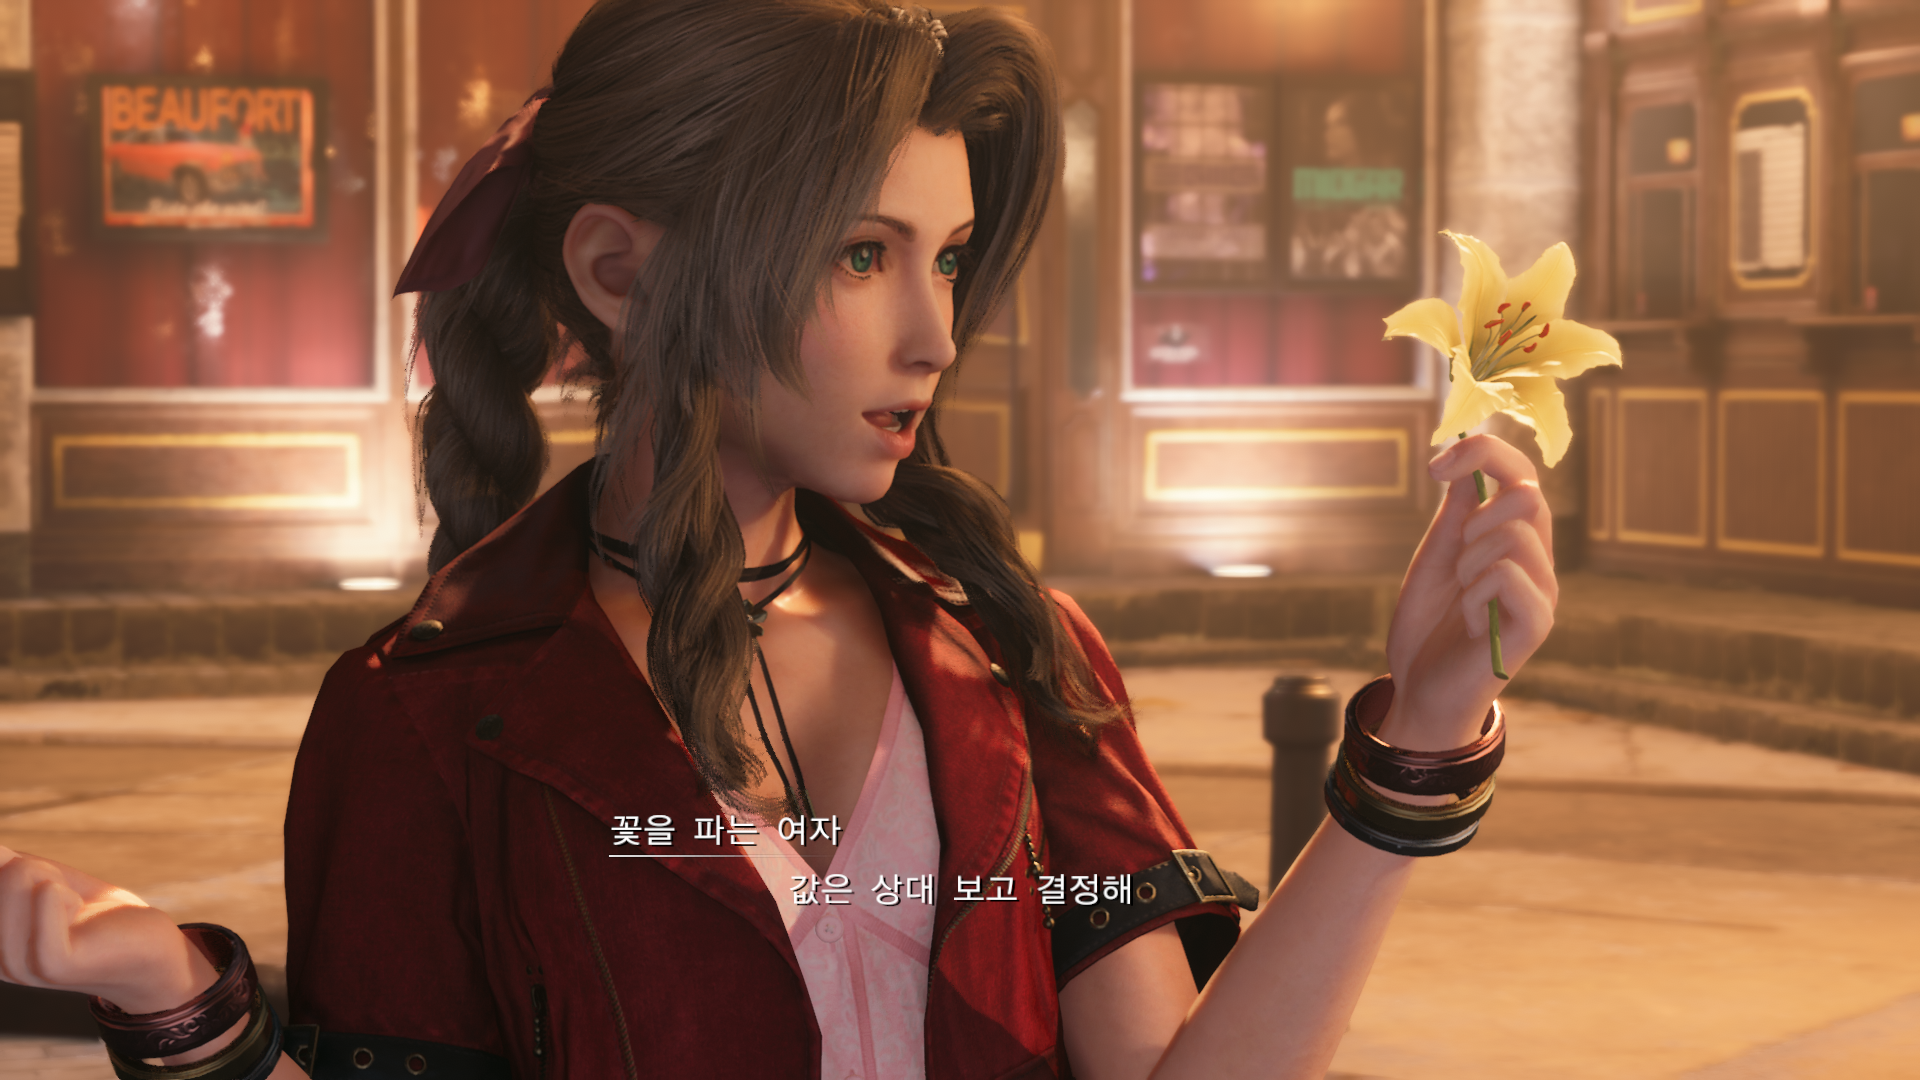
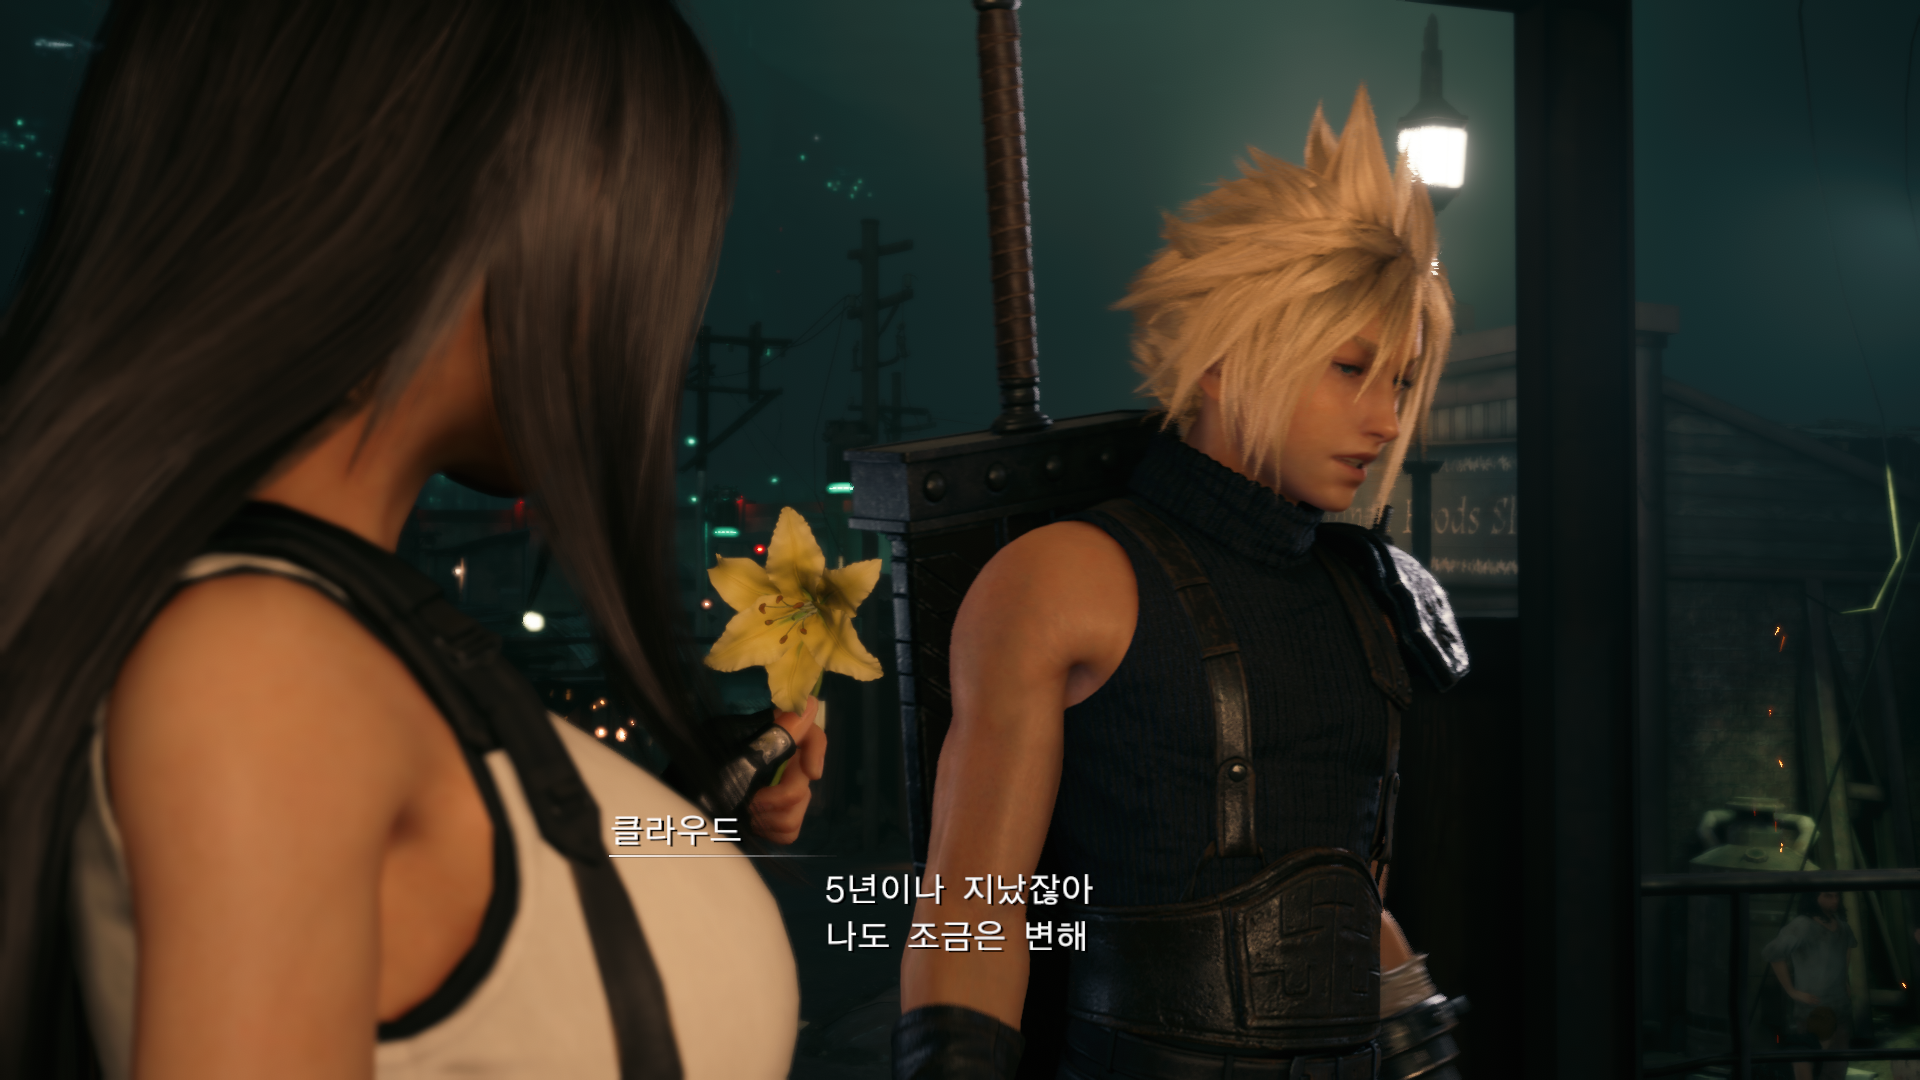
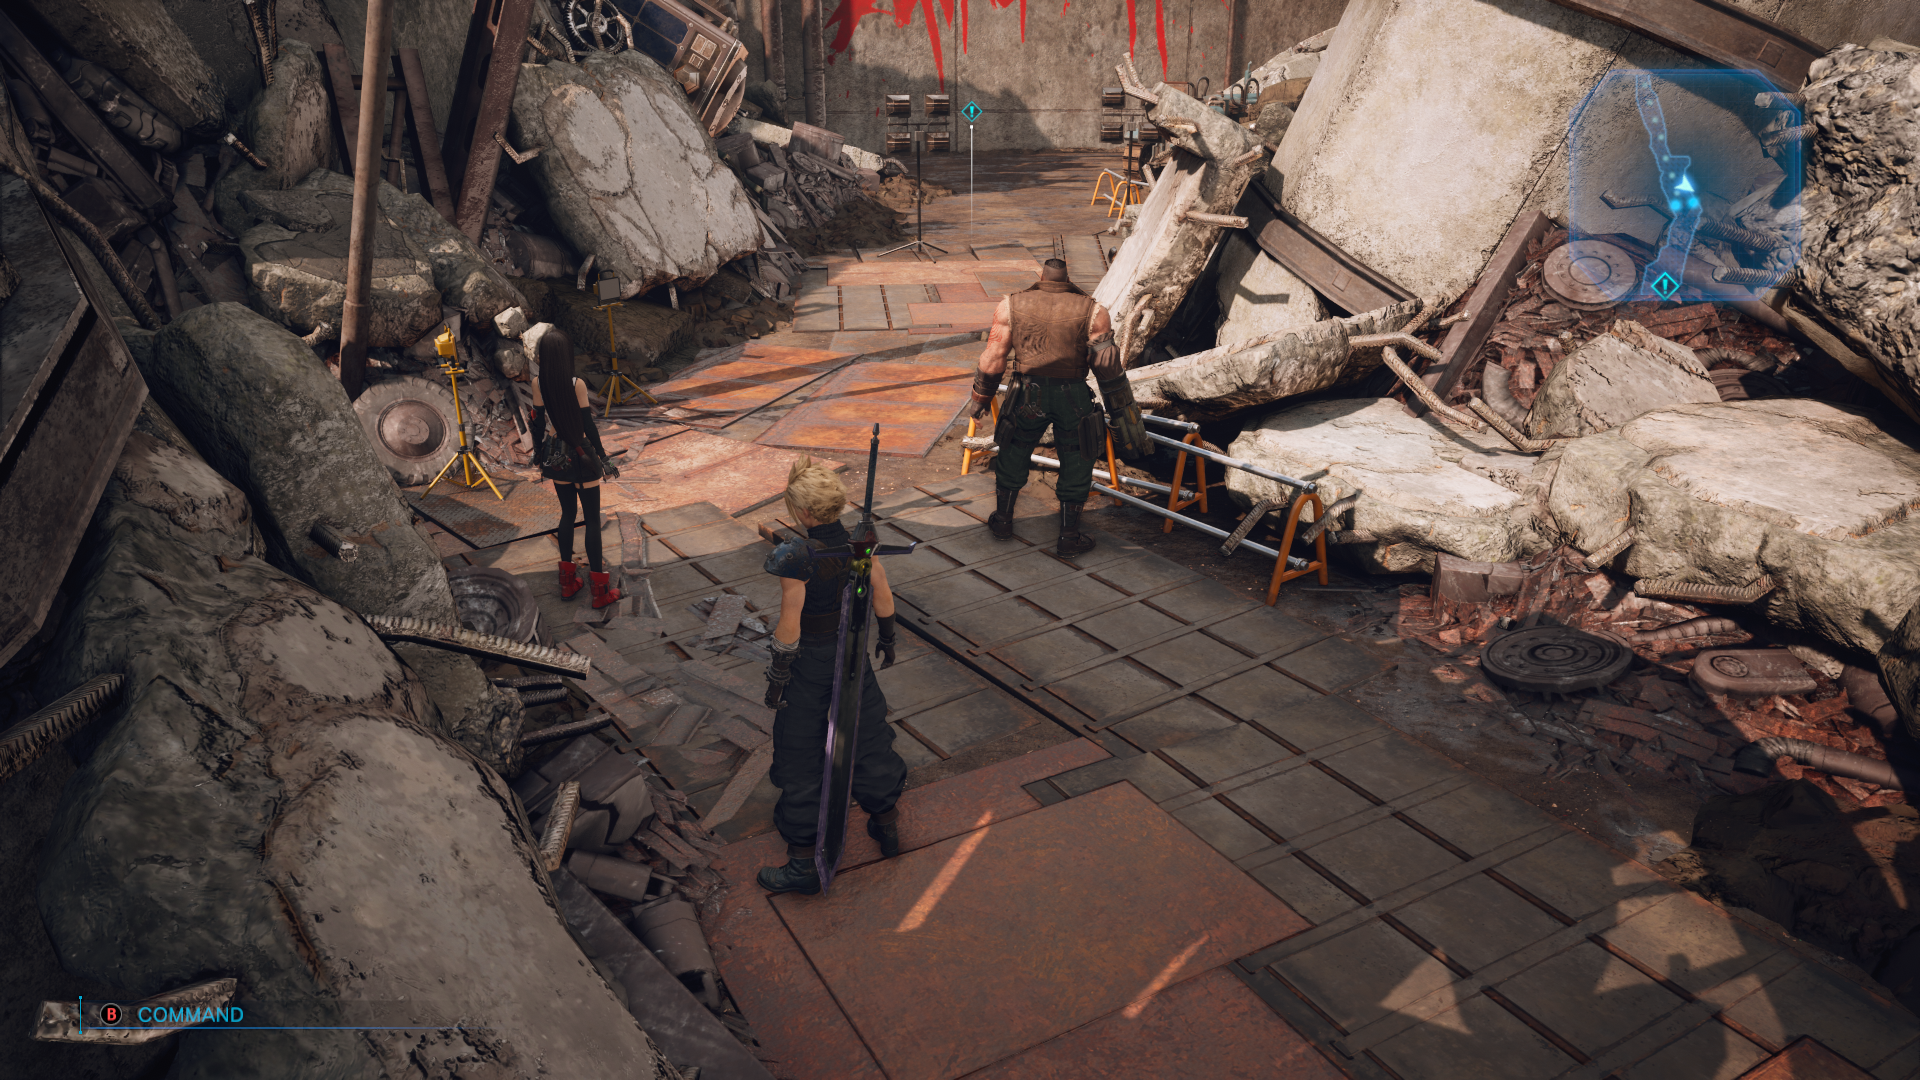
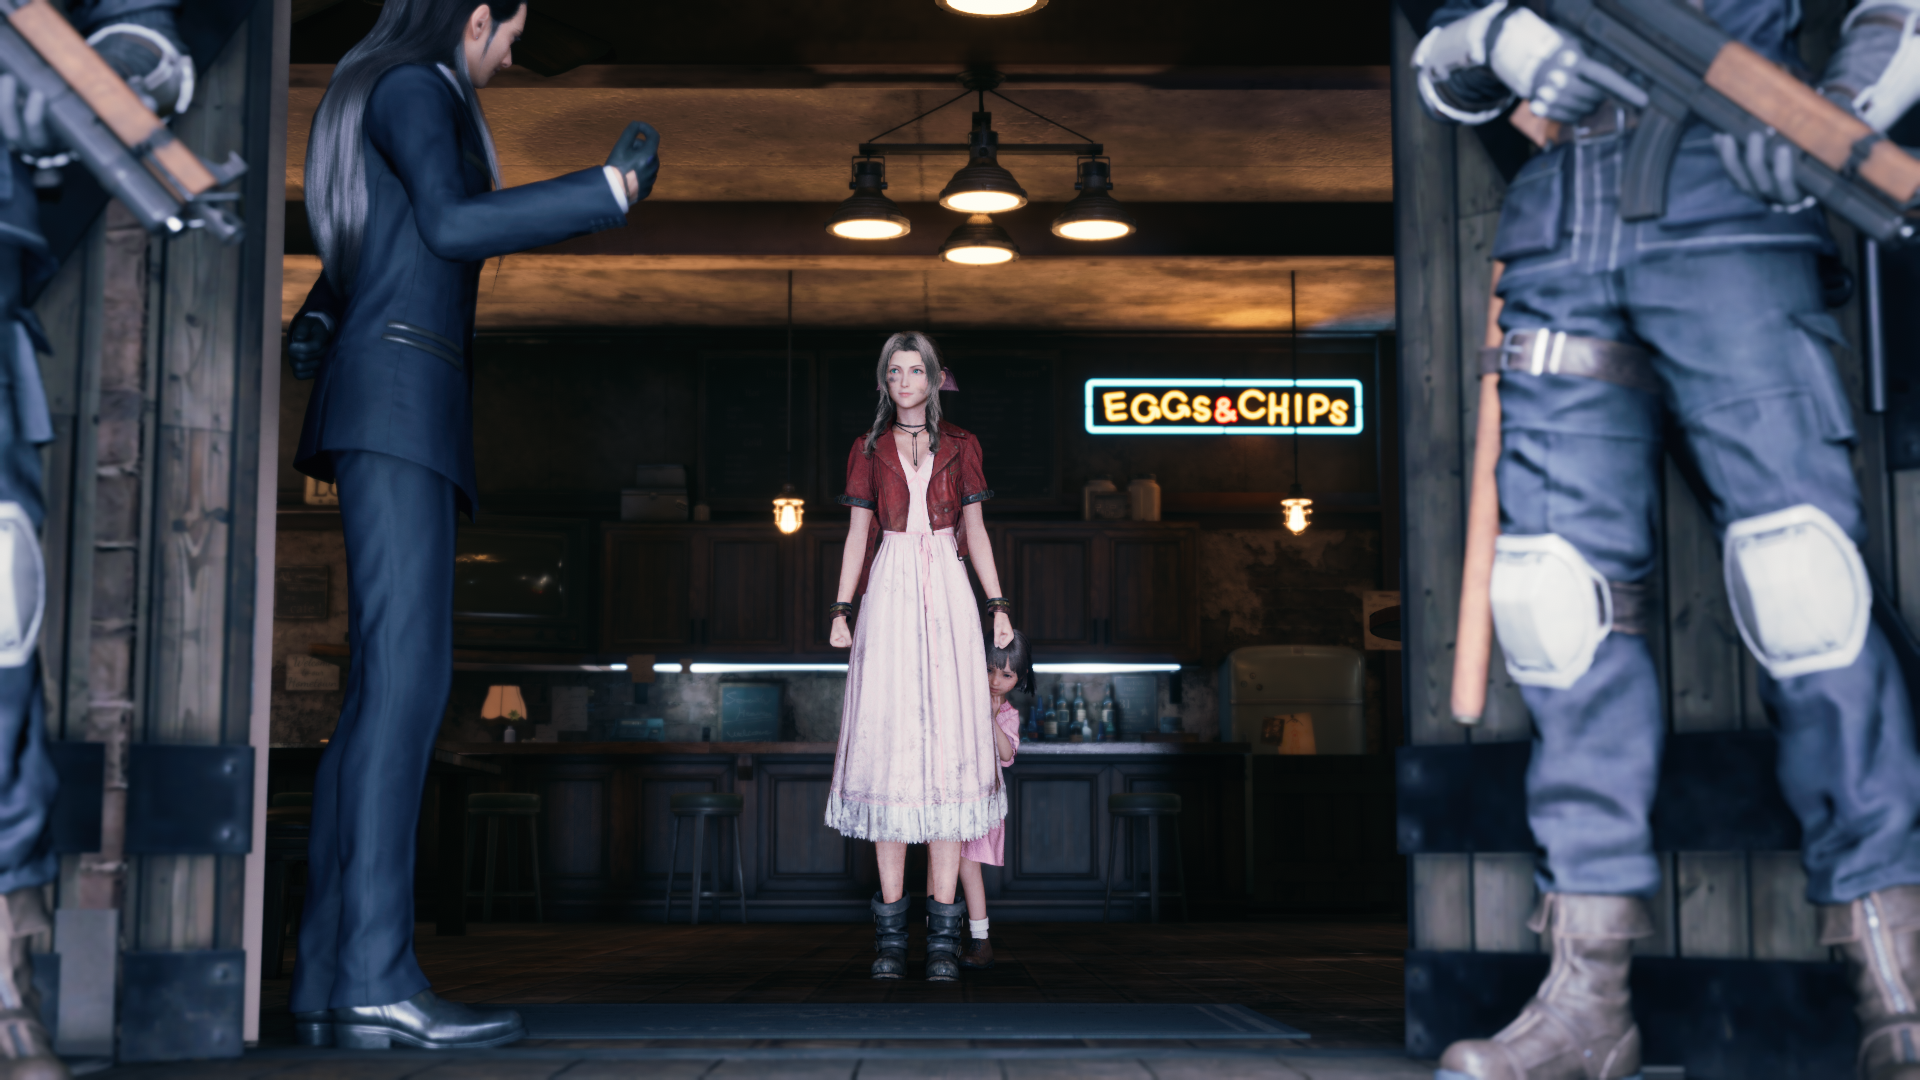
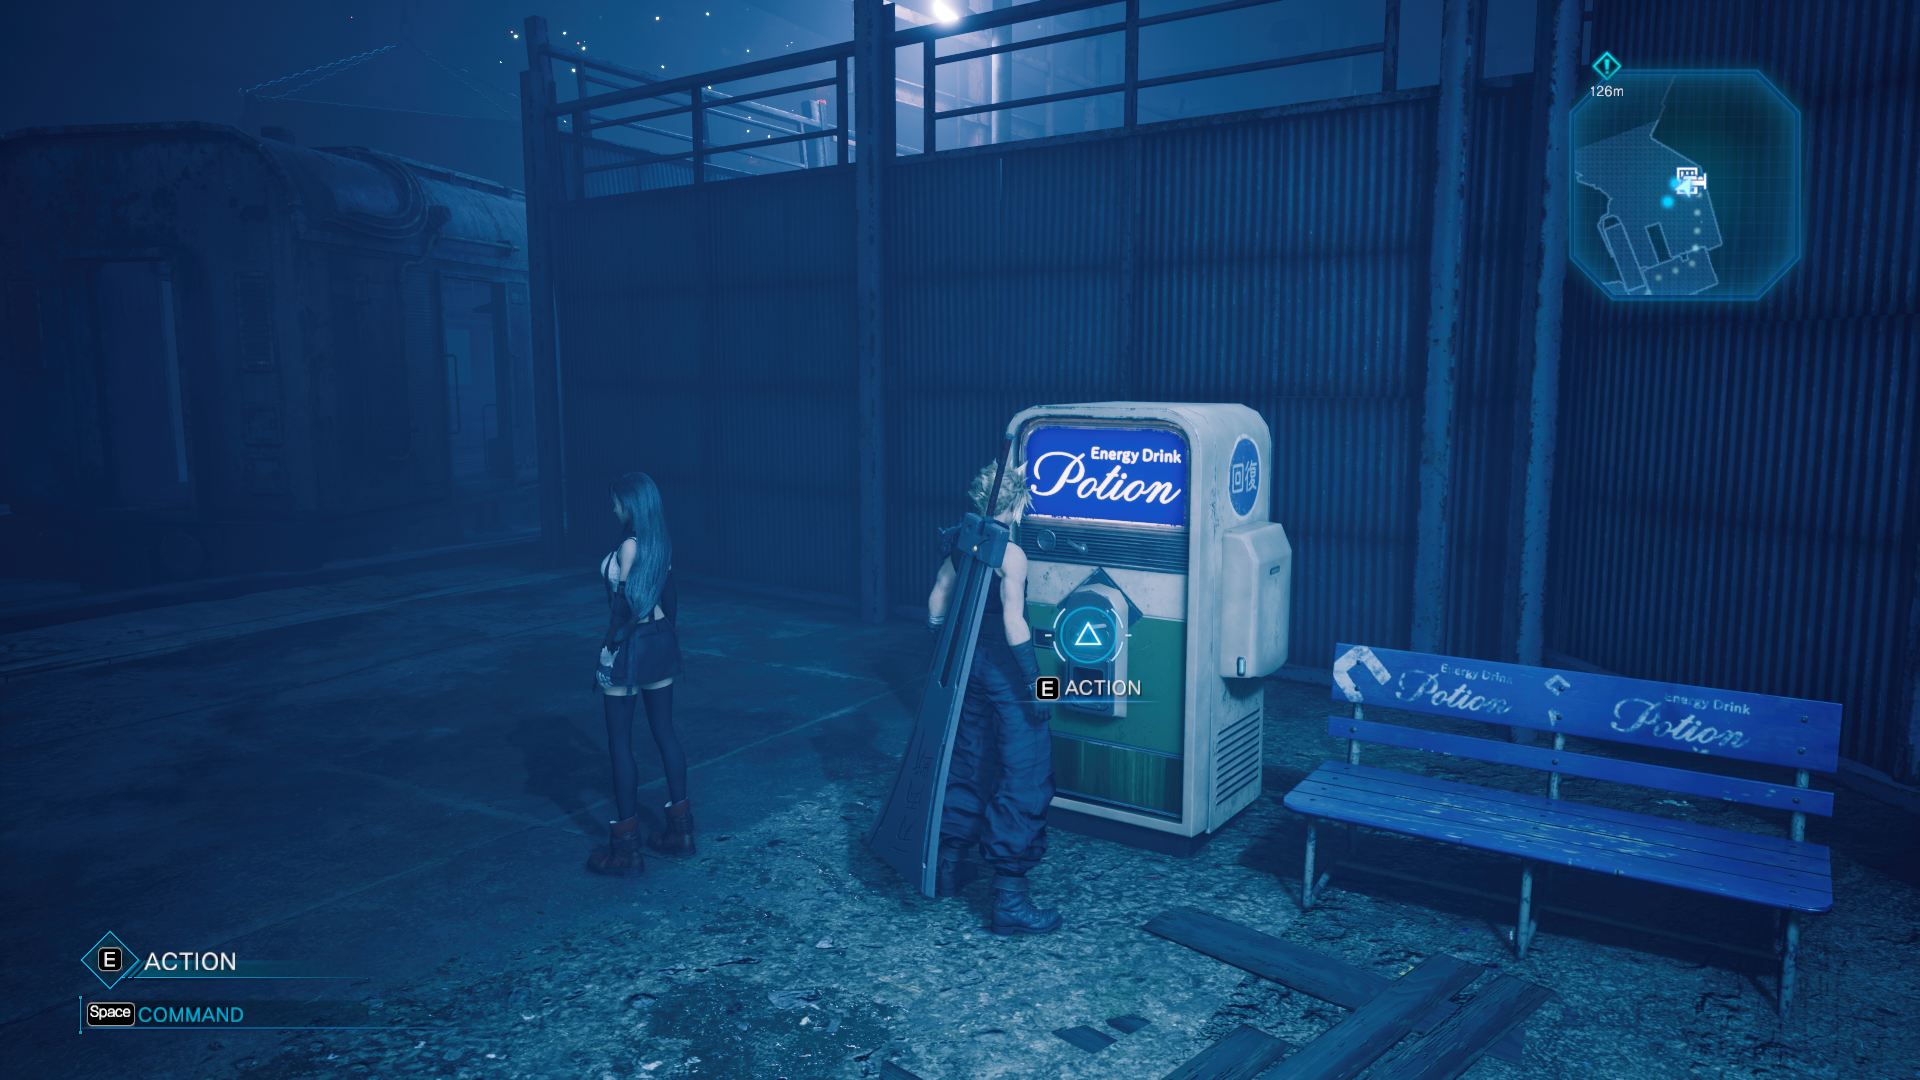
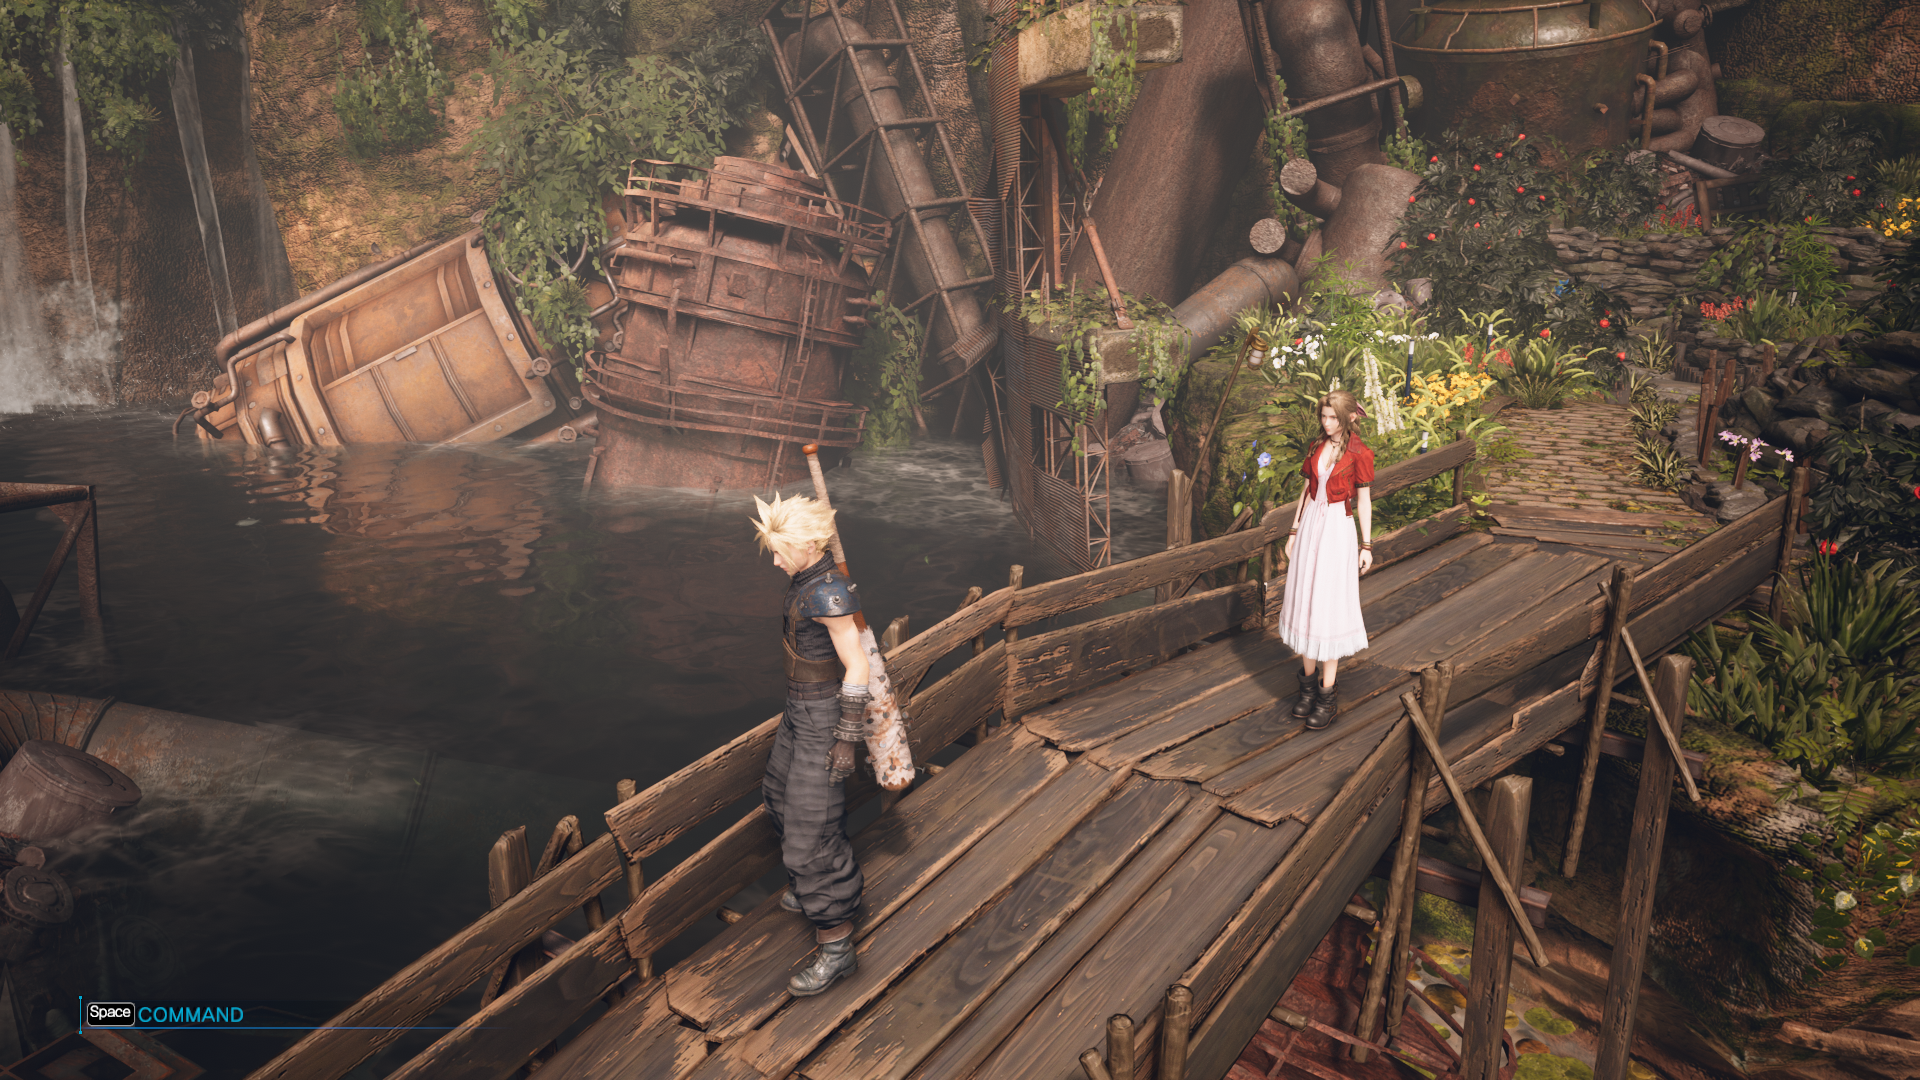
모드 적용 이후 스크린샷 몇 개를 가져와 봤습니다.
이 게임은 이상하게 스크린샷을 찍으면 한 10~20분전 화면이 찍혀서 과거 모습이 자꾸 스샷으로 찍히더라구요.. 현재 게임하는게 찍혀야 하는데
이유는 잘 모르겠고 아마 dx11로 강제 실행시키면서 생긴 문제가 아닌가 싶습니다.
어쨌던 모드만 정상적으로 다 적용하셨으면 순정보다는 훠~얼씬 좋은 그래픽으로 게임 가능합니다.
흐릿함은 전혀 없을겁니다.
다 했는데 렉걸려요
r.ScreenPercentage=200위에서 언급했듯이 고사양 세팅이며 저보다 사양이 부족하시면 렉 걸리실 수 있습니다. 타협을 원한다 싶으면 위 렌더링 스케일 값을 100~200 사이에 적당한 값으로 내리시고
HD Project 파일을 삭제해보세요.
그리고 에어리스 꽃밭 집이나 마을들은 렌더링 할것들이 많아서 (수 많은 꽃, 사람) 어쩔 수 없이 미세한 스터터링이 발생할 수 밖에 없습니다.
저는 약간의 렉을 주고 훨씬 좋은 해상도를 택했습니다. 싫으시면 그냥 순정으로 하시면 됩니다.
ffivhook 적용 됐는진 어떻게 알죠?
모드가 적용됐는지 확인을 원하시는 분들은 게임을 켠다음에 왼쪽 위에 ` (백틱) 버튼을 눌러보세요
왼쪽 아래 밑에 이런식으로 콘솔창이 뜨면 ffivhook 은 제대로 설정된겁니다.
ini 파일 값이 제대로 들어갔는지 알고 싶다면 ini 값 중 하나를 콘솔에 입력 해보면 압니다.
예를 들어 r.ScreenPercentage 를 200으로 ini 에서 설정했으니깐 r.ScreenPercentage 를 콘솔에 복붙해보세요
r.ScreenPercentage 를 입력하고 엔터 하면 콘솔창이 사라질껀데 여기서 ` (백틱) 버튼을 2번 누르면 콘솔창이 크게 위에 나타납니다
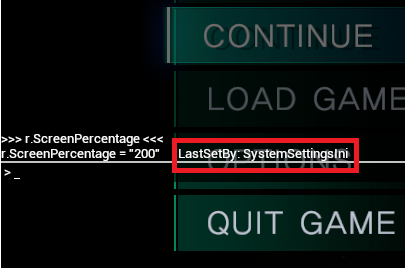
그러면 이렇게 r.ScreenPercentage 값이 200으로 입력되었고 오른쪽에 SystemSettingsIni 라고 표기된것을 확인할 수 있습니다. 이 ini 표기가 있어야 ini 파일이 제대로 등록된겁니다. 만약에 이게 아니면 제대로 입력 안된거에요.
이게 제대로 적용되려면 ini 파일에 [SystemSettings] 만 적고 이 아래에 값을 쭉 입력해야 적용이 되더군요. 이상하게 넥서스에 있던 것들은 [SystemSettings] 이외에 다른 Sections 들이 있어서 제대로 적용되고 있지 않았습니다.
참고로 ini에서 바꿀 수 있는 값을 콘솔에서 실시간으로 바꿔볼 수 있습니다. 이를 이용해 렉이 걸릴때 옵션 타협이 가능한데
예를 들어 ini 에서 연결된 r.ScreenPercentage 값을 100으로 내리고 싶다 하면 콘솔에
r.ScreenPercentage 100
이렇게 연결하면 됩니다
= 은 지우고 입력하시면 되요. = 을 입력하면 콘솔에서 인식 못합니다.
적당한 값을 찾으셨으면 ini 에 입력하시고 게임을 재시작 하시면 되겠습니다.
내용 참고 및 출처
https://www.fmkorea.com/5729718421
파이널 판타지7 리메이크 그래픽 모드 패치 방법(스터터링, 텍스쳐, 끊김 등등)
나온지 꽤 된 게임이라 별 도움은 안되겠고 방법이 근근웹에 있긴한데 예전 모드들 기준이라 새 기준으로 다시 적어봄.일단 FF7R 기본 그래픽이 존나 쓰레기에 옵션도 없고 스터터링이 내 컴에서
www.fmkorea.com
https://gall.dcinside.com/mgallery/board/view/?id=ff7&no=25487
자꾸 질문글 올라와서 4k 및 최적화 모드 패치 공략글 복붙해왔다. - 파이널 판타지 7 마이너 갤러
https://www.nexusmods.com/finalfantasy7remake/mods/74저질스러운 콘솔판의 여러 효과들을 개선시키거나 없앱니다.없애는 건 대표적으로 (동적해상도, 캐릭터만 피해서 심하게 꽉찬 D
gall.dcinside.com
https://bbs.ruliweb.com/game/85327/read/13019
[그래픽 팁] 그래픽 좋아지게 만들기 (코드 일부 수정) | 파이널 판타지 7 리메이크 | 루리웹
필수-우선 dx11 로 변경해줘야 하는데에픽런처 설정에 보시면 게임 부분에 주석을 달 수있는 곳이 있는데 그곳에-dx11한줄만 넣어주심 됩니다스팀 역시 마찬가지로, 그리드 이미지 우클릭->속성->
bbs.ruliweb.com
https://www.nexusmods.com/finalfantasy7remake/mods/98?tab=description
GFX PLUS Mod DX12 performance improved Potato to Enhanced Epic UE4 Scalability Groups Rendering settings
GFX+Improved GPU/VRAM performance optimizations with DX12 streaming/loading hitches Resolved majority of stutters hitches smooth OC single CPU core FPSSlightly Increased visual Quality to
www.nexusmods.com
'정보 > 게임' 카테고리의 다른 글
| 파판 7 리버스가 출시됐고 곧 킹덤컴 2가 출시됩니다 (0) | 2025.01.26 |
|---|---|
| [답지, 스포] 스팀 게임 "악성 코드(Malware)" 공략 + 치트엔진으로 미로 건너 뛰기 (0) | 2024.08.11 |
| 엘든링 DLC 황금 나무의 그림자 60프레임 제한 해제하기, 21:9 해제 등등 (1.12.2 최신 버전) + 스터터링 해결 모드 (5) | 2024.07.03 |
| 호라이즌 포비든 웨스트가 PC로 포팅되어 스팀에 발매했습니다 (1) | 2024.03.26 |
| 용과 같이 제로 0 스터터링(프리징), 소리 끊김 해결 방법 (0) | 2024.02.12 |


