
WIFI 모듈을 사용할때 가성비로 거론되는 esp-01 입니다.
싼 가격이 매우 장점이나 통신속도(baudrate)가 115200로 설정되어 있는데
아두이노에서 tx,rx 핀으로 통신을 위해 소프트웨어 시리얼을 사용하려면 통신속도(baudrate)를 9600으로 사용해야 합니다. 그래서 ESP-01을 연결해서 시리얼 통신을 통해 직접 esp-01의 통신속도를 조절해줘야 합니다.
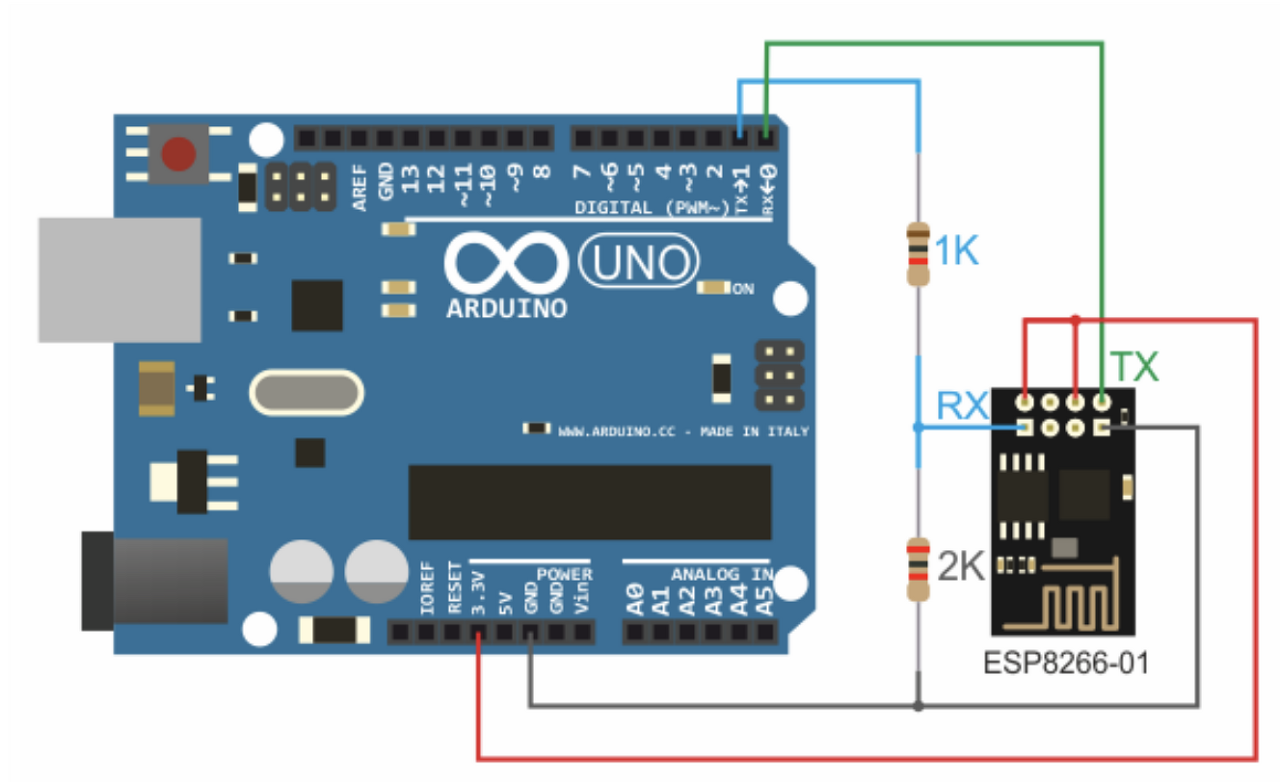
일단 문제점은 연결방법이 정말 x랄 맞습니다.
저렇게 연결해도 시리얼 통신이 제대로 안되는 경우가 있고
펌웨어를 바꿔주는 경우에는 또 FTDI 모듈을 가지고 바꿔줘야 합니다.
물론 본문 맨위에 사진에 올린것처럼 전용 어댑터를 사용하면 펌웨어를 바꿔줄 필요도 없고 복잡한 배선없이 사용할 수 있어서 그나마 암이 치유되는데요..
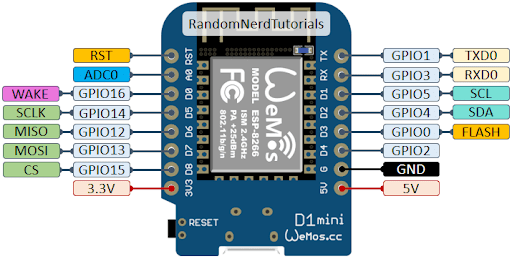
이번 프로젝트를 진행하면서 MQTT 프로토콜 연동 시연을 위해 처음에는 항상 사용하던 Wemos D1 Mini 보드를 채택했습니다. 그런데 esp 보드 시리즈 문제점이 아날로그 핀이 대부분 1개거나 5V출력이 없고 3.3V 출력밖에 없습니다 -.- wifi 자체가 붙어있어서 코딩만 하면 간편하게 사용할 수 있는게 특장점이긴 하죠..
Wemos D1 Mini의 경우에도 5V 출력은 있으나 아날로그 핀이 하나입니다.
이번에 진행할 프로젝트는 아날로그 신호가 생각보다 많이 필요하더라구요.
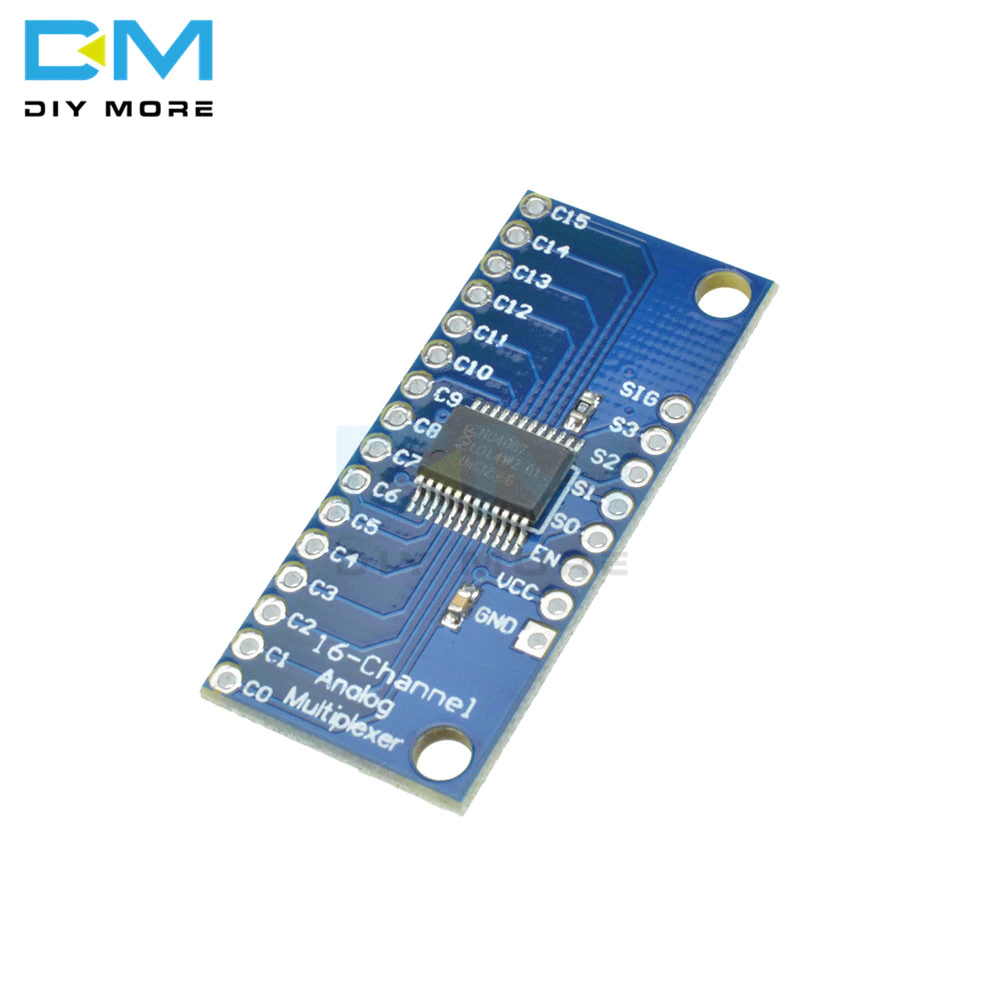
멀티플렉서를 사용하면 아날로그 출력을 여러개 입력받을 수 있으나 쪼마난 몇백원짜리 물건 사려고 배송비 내는게 돈이 아깝기도 하고..
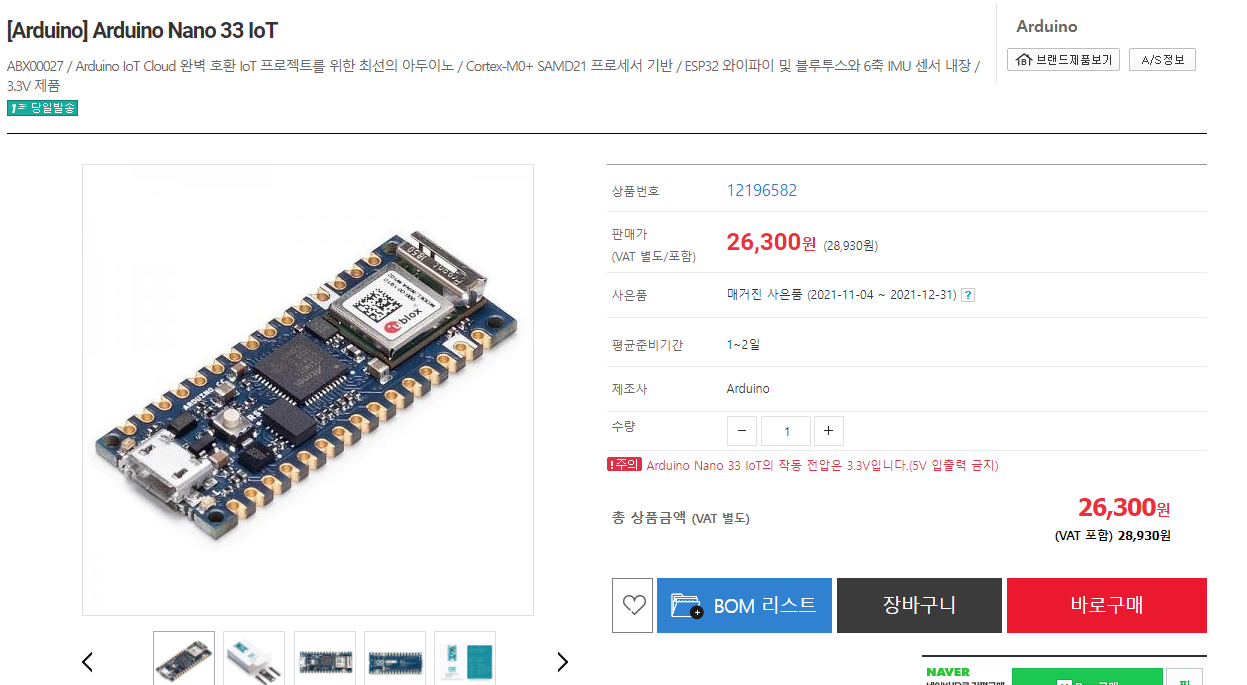
이렇게 와이파이 + 블루투스 각종 센서 다 달려 있고 아날로그 핀도 충분한 nano 33 IoT같은 만능 보드도 있는데 가격이 너무 나가네요. 수요가 많지도 않아서 카피보드도 없고 정품만 존재하는거 같습니다.
그래서 적당히 선택한게 esp-01입니다. 지금 프로젝트를 일반 나노에서 진행하고 있는데 가격도 싸고 와이파이 모듈이기도 해서 이걸로 결정했습니다.
esp-01로 MQTT 프로토콜은 쓸줄 모르는데 뭐 와이파이 된다니깐 당연히 될줄 알고 무지성으로 사고 박치기를 시작했습니다...

어댑터 + ESP01 조합으로 연결까진 성공
근데 왜인진 모르겠지만 이걸로 활용하는건 안나오고
대부분 펌웨어 업로드 + 보드레이트 변경, 시리얼 명령어로 통신해서 와이파이 찾고 SSID 연결에서 끝나버립니다.
활용하는게 거의 나오질 않더군요. ???

아니.. 나 돈 낭비한건가..?
혹시 안될까봐 세트로 2개 사서 거의 nano 33 iot 보드값 나왔는데.. 그냥 몇백원짜리 멀티플렉서 살껄 그랬나? 걍 같이 시키지 이건 왜 안시킨거지? 하고 후회가 몰려올때쯤에
머리속에 모든 생각을 지우고 구글링을 열심히 해봅니다.
.
.
.
https://github.com/nopnop2002/MQTT_via_ESP01
GitHub - nopnop2002/MQTT_via_ESP01: TCP/UDP Applicaton for UNO/MEGA/STM32 using ESP8266's AT firmware.
TCP/UDP Applicaton for UNO/MEGA/STM32 using ESP8266's AT firmware. - GitHub - nopnop2002/MQTT_via_ESP01: TCP/UDP Applicaton for UNO/MEGA/STM32 using ESP8266's AT firmware.
github.com
찾아보니 그럴싸한 깃허브 코드가 하나 나옵니다.
근데 깃허브 코드는 제대로 작동하는걸 못봤는데...
좀 삽질을 해보고 테스트 해본 결과 실제로 동작하는걸 확인했습니다.
서론이 너무 길었는데 삽질한걸 그냥 내 머리속에 두긴 아까워서.. 남겨봅니다.
아래 소스코드를 참고해주세요.
압축풀면 espLib.h 파일이 있을건데 이건 필요한 헤더파일이니깐 그냥 냅두시고
MQTT_Publish_ESP01.ino 를 조금 수정해주시면 됩니다.
#include "espLib.h"


#include <SoftwareSerial.h>
#define SERIAL_RX       10
#define SERIAL_TX       11
SoftwareSerial Serial2(SERIAL_RX, SERIAL_TX); // RX, TX
#define RUNNING_LED     0 // 0: Disable RUNNING_LED
#define _BAUDRATE_      9600
#define _SERIAL_        Serial2
#define _MODEL_         "ATmega328"


#define INTERVAL        1                     // 보낼 딜레이 (초)
#define MQTT_SERVER     "mqtt server host"         // You can change
#define MQTT_PORT       1883
#define MQTT_TOPIC      "espmqtt"          // You can change
#define MQTT_KEEP_ALIVE 60
#define MQTT_WILL_TOPIC "espmqtt"          // You can change
#define MQTT_WILL_MSG   "I am leaving..."       // You can change
#define _DEBUG_         0                       // for Debug

// Last Packet Send Time (MilliSecond)
unsigned long lastSendPacketTime = 0;

int buildConnect(char *buf, int keep_alive, char *client_id, char *will_topic, char *will_msg) {
  int rlen = 12;
  int pos = 14;

  int client_id_len = strlen(client_id);
  //Serial.println(client_id_len);
  buf[pos++] = 0x00;
  buf[pos++] = client_id_len;
  for(int i=0;i<client_id_len;i++) {
    buf[pos++] = client_id[i];
  }
  rlen = rlen + 2 + client_id_len;

  int will_topic_len = strlen(will_topic);
//  Serial.print("will_topic_len=");
//  Serial.println(will_topic_len);
  int will_msg_len = strlen(will_msg);
//  Serial.print("will_msg_len=");
//  Serial.println(will_msg_len);

  if (will_topic_len > 0 && will_msg_len > 0) {
    buf[pos++] = 0x00;
    buf[pos++] = will_topic_len;
    for(int i=0;i<will_topic_len;i++) {
      buf[pos++] = will_topic[i];
    }
    buf[pos++] = 0x00;
    buf[pos++] = will_msg_len;
    for(int i=0;i<will_msg_len;i++) {
      buf[pos++] = will_msg[i];
    }
    rlen = rlen + 2 + will_topic_len + 2 + will_msg_len;
  }

  buf[0] = 0x10;
  buf[1] = rlen;
  buf[2] = 0x00;
  buf[3] = 0x06;
  buf[4] = 'M';
  buf[5] = 'Q';
  buf[6] = 'I';
  buf[7] = 's';
  buf[8] = 'd';
  buf[9] = 'p';
  buf[10] = 0x03;
  buf[11] = 0x02;
  if (will_topic_len > 0 && will_msg_len > 0) buf[11] = 0x06;
  buf[12] = 0x00;
  buf[13] = keep_alive;
  return buf[1] + 2;
}

int buildPublish(char *buf, char *topic, char *msg) {
  int tlen = strlen(topic);
  for(int i=0;i<tlen;i++) {
    buf[4+i] = topic[i];
  }
  int mlen = strlen(msg);
  for(int i=0;i<mlen;i++) {
    buf[4+tlen+i] = msg[i];
  }
  buf[0] = 0x30;
  buf[1] = tlen + mlen + 2;
  buf[2] = 0x00;
  buf[3] = tlen;
  return buf[1] + 2;
}

void mqttPingreq() {
  static long lastKeepAlive = 0;
  char pingreq[] = {0xc0,0x00};
  long now = millis();
  if (lastKeepAlive  > now) return;

  //Send to PINGREQ
  Serial.println();
  Serial.println("Sending PINGREQ");
  int ret = sendData(-1, pingreq, 2, "", 0);
  if (ret) errorDisplay("PINGREQ send fail");

  //Wait for PINGRESP
  waitForString("+IPD", 4, 1000);
#if 0
  if (!waitForString("+IPD", 4, 5000)) {
    errorDisplay("PINGRESP Fail");
  }
#endif
  getResponse(1000);
  //ATmegaではlong=int*1000はマイナスになる
  //In ATmega, long = int * 1000 becomes negative
  //long=long(int)*1000は正しい値になる
  //long = long (int) * 1000 is the correct value
  lastKeepAlive = now + long(MQTT_KEEP_ALIVE) * 1000;
  if (lastKeepAlive < 0) lastKeepAlive = long(MQTT_KEEP_ALIVE) * 1000; // OverFlow
//  Serial.print("lastKeepAlive(9)=");
//  Serial.println(lastKeepAlive);
}

void mqttPublish(char * buf, int blen) {
  //Send to PUBLISH
  int ret = sendData(-1, buf, blen, "", 0);
  if (ret) errorDisplay("PUBLISH send fail");

  //Wait for PUBACK
  waitForString("+IPD", 4, 1000);
#if 0
  if (!waitForString("+IPD", 4, 5000)) {
    errorDisplay("PUBACK Fail");
  }
#endif
  getResponse(1000);
}


void mqttDisconnect() {
  char disconnect[] = {0xe0,0x00};
  //Send to DISCONNECT
  int ret = sendData(-1, disconnect, 2, "", 0);
  if (ret) errorDisplay("DISCONNECT send fail");

  //Wait for CLOSE
  if (!waitForString("CLOSE", 5, 5000)) {
    errorDisplay("CLOSE Fail");
  }
  clearBuffer();
}


void setup(){
  char cmd[128];
  int msize;

  Serial.begin(9600);
  //delay(5000); //ESP가 자동으로 연결하고 안전성을 위해 초반 딜레이를 준다.
  Serial.print("_MODEL_=");
  Serial.println(_MODEL_);
  _SERIAL_.begin(_BAUDRATE_);

  //Save Serial Object
  serialSetup(_SERIAL_);

  if (RUNNING_LED) {
    pinMode(RUNNING_LED,OUTPUT);
    digitalWrite(RUNNING_LED,LOW);
  }


  //자동 접속 활성화
  sendCommand("AT+CWAUTOCONN=1");
  if (!waitForString("OK", 2, 1000)) {
    errorDisplay("AT+CWAUTOCONN Fail");
  }
  clearBuffer();


  //SSID 자동으로 잡기
  sendCommand("AT+CWJAP=\"SSID\",\"PW\"");
  if (!waitForString("WIFI GOT IP", 11, 10000)) { //접속성공문자 (11글자)를 최대 10초까지 기다린다.
    errorDisplay("Connection Fail");
  }

  //모듈 재시작 (필요없는거 같아서 잠시 제거)
  /*
  sendCommand("AT+RST");
  if (!waitForString("WIFI GOT IP", 11, 10000)) {
    errorDisplay("ATE+RST Fail");
  }
  clearBuffer();
*/


  //Local echo off 에코 비활성화 (받은 명령어를 재 수신 하지 않습니다.) - 이것도 필요없는거 같아서 제거
  /*
  sendCommand("ATE0");
  if (!waitForString("OK", 2, 1000)) {
    errorDisplay("ATE0 Fail");
  }
  clearBuffer();
  */

  //IP 가져오기
  char IPaddress[64];
  getIpAddress(IPaddress,sizeof(IPaddress),2000);
  Serial.print("IPaddress=[");
  Serial.print(IPaddress);
  Serial.println("]");

  //MAC 주소 가져오기
  char MACaddress[64];
  getMacAddress(MACaddress,sizeof(MACaddress),2000);
  Serial.print("MACaddress=[");
  Serial.print(MACaddress);
  Serial.println("]");

  //Establishes TCP Connection
  sprintf(cmd,"AT+CIPSTART=\"TCP\",\"%s\",%d",MQTT_SERVER,MQTT_PORT);
  sendCommand(cmd);
  if (!waitForString("OK", 2, 5000)) {
    Serial.println("Check your MQTT SERVER");
    errorDisplay("AT+CIPSTART Fail");
  }
  clearBuffer();

  //Client requests a connection to a server
  Serial.print("MQTT CONNECT.....");
  //Client requests a connection to a server
  msize = buildConnect(cmd,MQTT_KEEP_ALIVE,MACaddress,MQTT_WILL_TOPIC,MQTT_WILL_MSG);
  if (_DEBUG_) hexDump(cmd,msize);
  int ret = sendData(-1, cmd, msize, "", 0);
  if (ret) errorDisplay("MQTT Connect Fail");

  //Wait for CONNACK
  if (!waitForString("+IPD", 4, 5000)) {
    errorDisplay("CONNACK Fail");
  }
  getResponse(1000);
  Serial.println("OK");

  Serial.println("Start MQTT Publish [" + String(_MODEL_) + "] to " + String(MQTT_SERVER));
  lastSendPacketTime = millis();
}

void loop(){
  static int counter = 0;
  static int timer = INTERVAL;
  static int ledStatus = 1;
  char msg[128];
  char payload[128];
  int msize;

  unsigned long now = millis();
  if ( (now - lastSendPacketTime) < 0) {
    lastSendPacketTime = now;
  }

  if ( (now - lastSendPacketTime) > 1000) {
    lastSendPacketTime = now;
    timer++;
    if (RUNNING_LED) digitalWrite(RUNNING_LED,ledStatus);
    ledStatus = !ledStatus;
#if 0
    Serial.print("ledStatus=");
    Serial.print(ledStatus);
    Serial.print("timer=");
    Serial.print(timer);
#endif
    if ( (timer % 10) == 0) Serial.print("+");
    if ( (timer % 10) != 0) Serial.print(".");

    if (timer >= INTERVAL) { // 타이머 인터벌이 닿았으면
      //메세지 Publish
      sprintf(msg,"Custom MSG!"); //포맷화 한다음 출력후 msg에 저장한다

      Serial.println();
      Serial.println("Sending PUBLISH");
      Serial.println(msg);

      msize = buildPublish(payload, MQTT_TOPIC, msg); //Publish Build
      mqttPublish(payload,msize); //Publish 수행

      timer = 0; //타이머 다시 초기화
    }
  } // endif
  mqttPingreq(); //세션 유지용
}
바꿔줄 부분은 일단 baudrate 는 맞춰서 설정, topic이랑 server도 맞춰서 입력해주시면 됩니다.
  sendCommand("AT+CWJAP=\"SSID\",\"PW\"");
  if (!waitForString("WIFI GOT IP", 11, 10000)) { //접속성공문자 (11글자)를 최대 10초까지 기다린다.
    errorDisplay("Connection Fail");
  }
그리고 이부분에서 쌍따옴표에 신경 쓰지 마시고 안에 있는 SSID는 SSID명, PW는 PW명 적어주시면 됩니다.
소스코드에 쓸모없는 부분이 너무 많아서 제가 대부분 치워낸 소스가 있는데 이건 조금만 덜어낸 소스입니다.
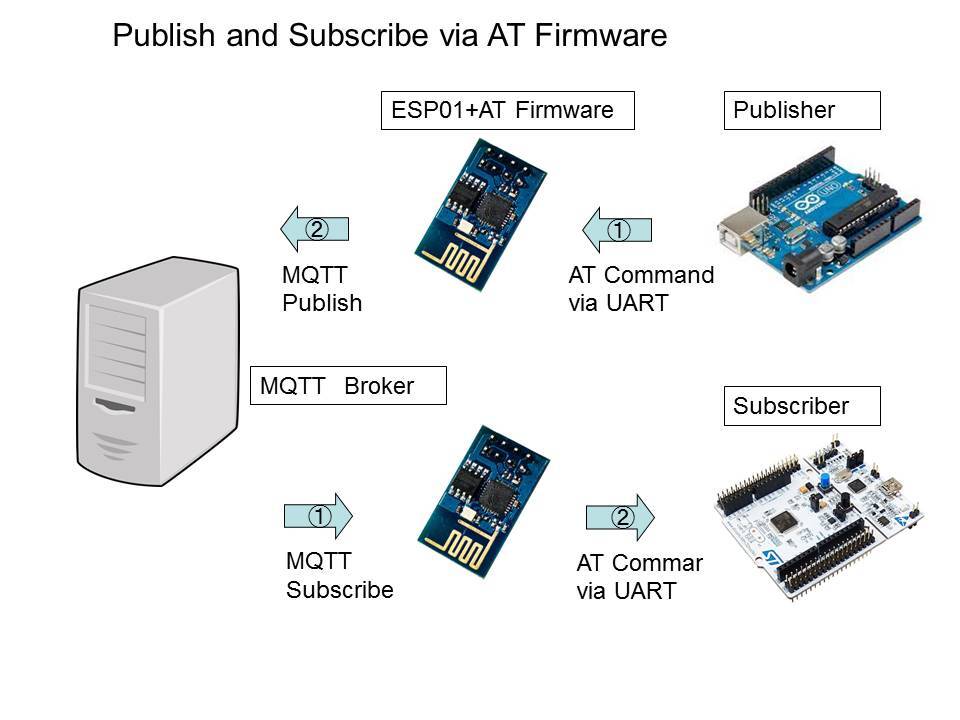
원리를 간단히 보자면 ESP01이 standard alone 로 작동하니 시리얼 통신을 보내서 esp01이 중개자로써 publish를 보냅니다. 제어하는건 아두이노구요.
esp01에 명령어 중에 웹 요청을 보내는 명령어가 있는데 espLib.h 파일에 이것이 사용된걸로 보여집니다.
어쨌든 이걸 사용하면 esp01 , 아두이노로 mqtt 프로토콜 신호를 보낼 수 있습니다.
하지만 사용해본 문제점으론 시리얼 통신을 진행하는데 esp01이 주는 데이터도 가뜩이나 느린데 통신속도도 9600이라 정말 느립니다.. 저걸로 보내면 1초씩 걸리던 일들이 저 부분에서 거의 5초간 딜레이가 걸립니다.
결론
- 집에 esp01이 돌아다니고 mqtt가 해보고 싶으면 한번 사자
- 성능에 문제 없고 편하게 할려면 자신의 프로젝트 규약에 맞는 wifi 붙은 보드를 사자.
(차라리 Wemos D1 + 멀티플렉서가 본인의 경우엔 나았을듯..)
'프로젝트 > 아두이노' 카테고리의 다른 글
| [Arduino] 아두이노 레오나르도 절대 좌표 이동 구현 (영상 포함) (5) | 2022.11.13 |
|---|---|
| DJ MAX Respect V 리듬 게임 컨트롤러 자작기 - 1편 [재료구비] (0) | 2021.08.09 |
| MQTT + Wemos D1 Mini로 에어컨 무선 원격제어하기 (0) | 2020.07.17 |
| MQTT + DHT22(AM2302) 센서 신호 보내기(publish) (9) | 2020.07.16 |
| BLYNK로 ESP8266 여러개 제어하기 (Multiple Device) (0) | 2020.07.05 |


